Want to learn how to create a mega menu in WordPress? If you've been feeling frustrated trying to organize your growing site's navigation, you're not alone. A well-designed mega menu could be exactly what you need to make your website more user-friendly and keep visitors from getting lost in your content.
Creating an effective mega menu isn't just about dumping links into a dropdown - it needs thoughtful planning that considers your site's structure, your visitors' needs, and your overall design. But don't let that intimidate you!
Whether you're new to WordPress or you've been building sites for years, we'll walk you through a simple, step-by-step process to create a professional mega menu that both looks great and works smoothly. Ready to transform your site's navigation into something your visitors will actually enjoy using?
When Should You Use Mega Menus?
A mega menu is a user-friendly navigation feature that displays a website's main content categories in an organized, easy-to-read dropdown panel. When you hover over or click on a main menu item, it expands to reveal a more detailed grid layout of the site's structure.
What sets mega menus apart is their ability to present a lot of information in a clear, structured way. They often have multiple columns or sections that group related content together, making it simple to scan and find what you're looking for.
You should use mega menus if you have:
A large e-commerce site with numerous product categories
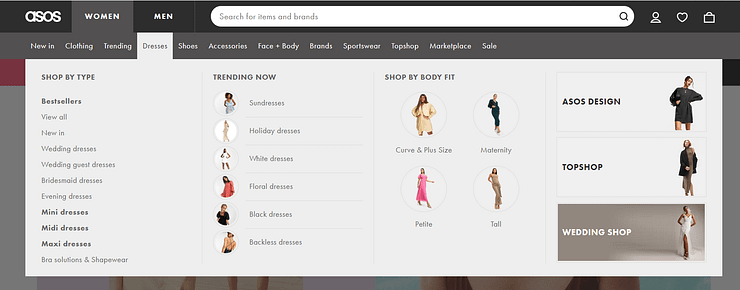
A site with a lot of content divided into various topics and subtopics

A SaaS site with multiple offerings and resources (like us!)

The goal of a mega menu is to make navigating a website more intuitive and efficient. They provide a visual roadmap of the site's hierarchy, allowing users to easily browse and access the content they need without getting lost or frustrated.
…But You’ll Need More than a Mega Menu to Create a Great User Experience
While a mega menu can be a powerful tool for navigating a website, it's just one piece of the puzzle when it comes to creating an effective and user-friendly experience.
To design a landing page (or website) that truly engages and converts visitors, you need to consider the entire layout, from the header and footer to the content structure and visual elements on your page.

The Thrive Architect Mega Menu
You might be tempted to use a separate menu builder
plugin just for making your mega menu, but be careful!
Sometimes, this can cause problems with the way your landing page looks and works
A mega menu made by a different tool might not fit in with the rest of your design, making things look disconnected. For example, if the plugin’s menu theme settings clash with your current WordPress theme, this could spell trouble for how your site functions.
And even if you do manage to create a working menu, you still need to make sure the other parts of your landing page are set up in a way that encourages visitors to take action.
That's where using a single tool that's designed for creating intuitive web pages can be a big help. With an all-in-one page builder, you can control every part of your page, from the mega menu to the content and layout. This way, you can be sure that everything looks great, works well together, and guides your visitors towards your goal.
How to Add a Mega Menu to Your WordPress Website (The Right Way)
If you're ready to improve your site's navigation with a mega menu, you're in the right place. In this guide, we'll walk you through the process using Thrive Architect, a tool that allows you to create effective mega menus that seamlessly align with your webpages and, overall, your website.
While a mega menu is a key element of a user-friendly site, it should also harmonize with your overall design and layout. Let's dive in and build a mega menu that not only operates smoothly but also looks fantastic and integrates perfectly with your site.
1. Download and Install Thrive Architect
Let’s look at it like this: a mega menu is like a roadmap for your website. It helps visitors navigate through your content easily and find exactly what they're looking for without getting lost or frustrated.
That's where Thrive Architect comes in.
Thrive Architect is a powerful WordPress
plugin that makes creating beautiful, SEO-friendly pages with intuitive navigation a breeze.
It helps you effortlessly guide visitors to the information they need, keeping them engaged and interested in exploring more.
Ready-Made Templates that are Easy to Navigate
With this landing page plugin, you can create a visual hierarchy that guides your readers through your content in a way that feels natural and intuitive. No more endless scrolling or searching for hidden navigation – just a seamless, engaging experience that keeps your audience hooked from start to finish.
Thrive Architect's landing page library is one of its main winning features, boasting hundreds of templates that are designed to bring in results.
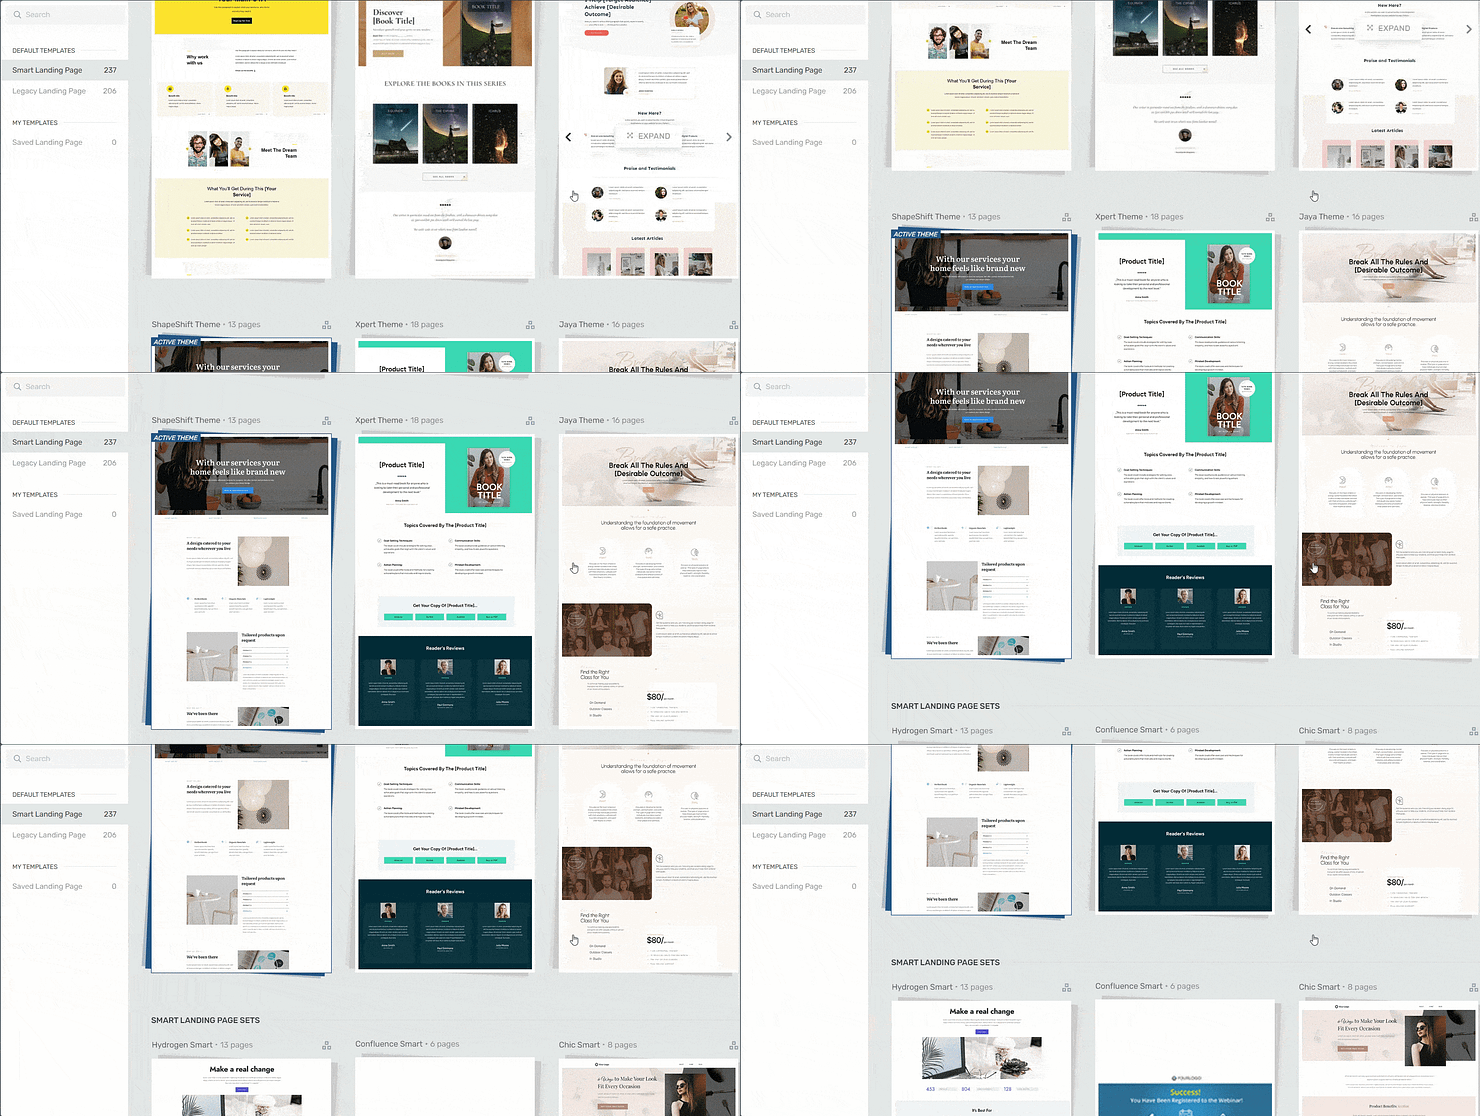
Landing page template sets in Thrive Architect
Coupled with Thrive Architect’s drag-and-drop
front-end editor, building high-converting landing pages couldn’t be any easier.
Conversion-Focused So You Get RESULTS
And let's talk about those conversion-focused elements – they're your secret weapon for turning passive readers into action-takers.
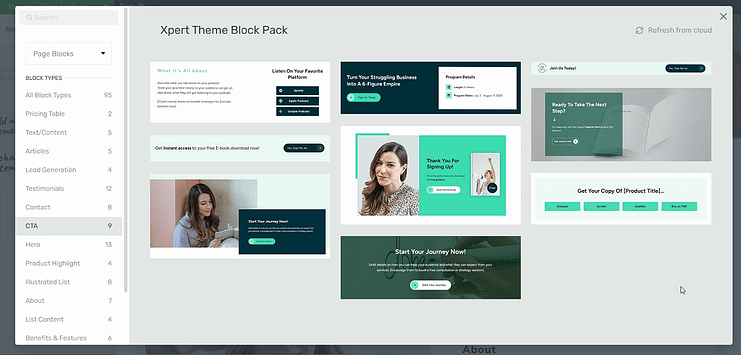
Example of CTA sections available in Thrive Architect
In a few clicks, you can easily place call-to-action buttons, testimonials, WooCommerce widgets, and countdown timers exactly where they'll have the most impact. Plus, with Thrive Architect's mega menu feature, you can guide your visitors to these key elements, making sure they don't miss out on any important information or opportunities.
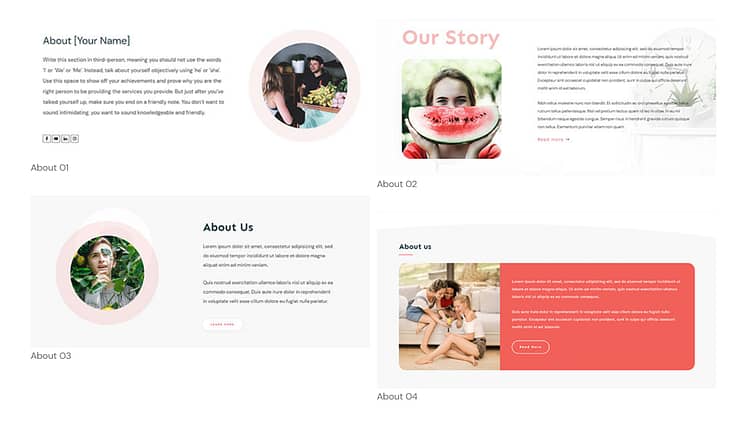
Examples of Thrive Architect Block Templates
But perhaps the best part about using a tool like Thrive Architect is that it empowers you to create professional, polished landing pages with intuitive navigation that reflect the quality of your brand.
No more settling for clunky, disjointed pages that don’t work well. Now, you get to design your website like a pro.
Conditional Display: The Best Way to Show Different Menu Items and CTAs to Different Visitors
Have you ever wished you could customize your website's navigation or call-to-actions for different visitors? Maybe you want to show specific menu items to returning customers or display different CTAs to first-time visitors. That's where Thrive Architect's Conditional Display feature comes in
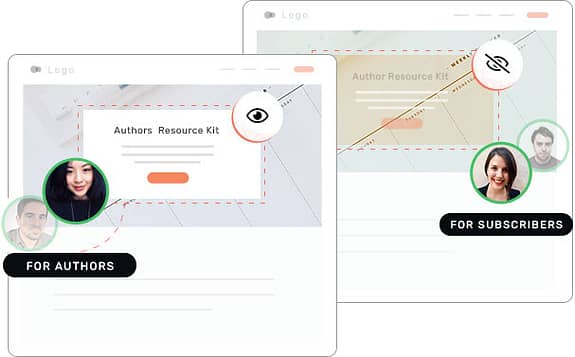
The concept of Conditional Display is simple: Show specific content based on certain display criteria.
Show or hide specific menu items or CTAs on your pages based on conditions like:
User behavior: Display different navigation options or CTAs to returning visitors, logged-in users, or previous customers.
Referral source: Customize menus or other content based on where visitors came from, like specific websites or social media platforms.
User preferences: Adapt navigation, CTAs, or your page layout to a specific time, date, etc.
Targeted lead generation: Show different CTAs or menu items based on user interactions or profile information.
Imagine being able to show a special "Members Only" menu item to logged-in users or display a "Welcome Back" CTA to returning visitors. With Thrive Architect's Conditional Display, you can create a truly personalized experience for each visitor, guiding them to the most relevant content and actions based on their unique characteristics.
And you can see it in action right here:
This is just a taste of the powerful features you get when you buy Thrive Architect. Landing page templates, Conditional Display, pricing tables, call to action blocks, carousels, table of contents, search bars, and so much more.
You'd need to install at least 5 to 8 separate premium plugins and several add-ons to make this happen…
Which could end up costing you north of $500+ – without the guarantee that all these tools will work together without slowing down your website.
Why go through all that hassle when you can grow your business faster (and easily) with this powerful plugin?
2. Create or Open a Page in WordPress
Creating a new WordPress page for your website is super straightforward.
In the WordPress Dashboard, select “Add New” in the top menu and choose “Page”
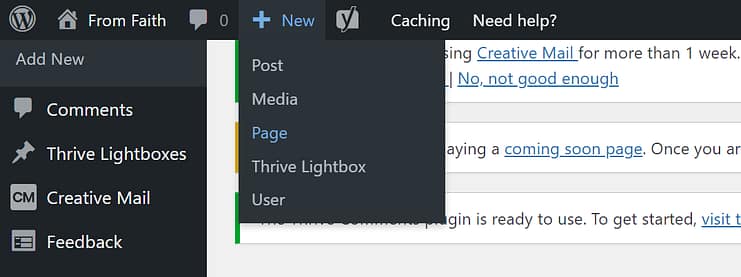
In the WordPress Block Editor, name your page and click the “Launch Thrive Architect” button.

Thrive Architect will give you four options:
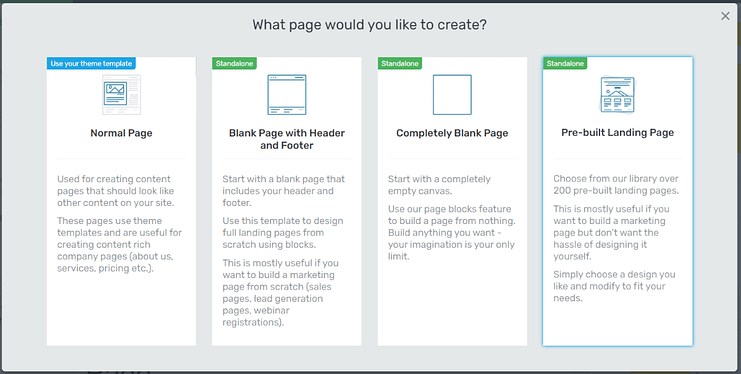
1. Normal Page
2. Blank Page with Header and Footer
3. Completely Blank Page
4. Pre-built Landing Pages
For easier and faster building, we recommend choosing the “Pre-built landing page” option.
When you’ve found the right template, click on it and it should load.
3. Choose Your Menu Type
In Thrive Architect, search for the “Custom Menu” element in the sidebar on the right to create a new menu.
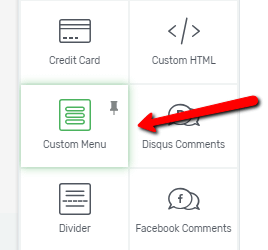
Drag and drop the element on your chosen display location on the page. You don’t need to add a menu name.
If your landing page doesn’t have a header, we recommend adding your menu to the top of your page for easy navigation. This is one of the best menu locations.
Once you’ve placed the “Custom Menu” element, a screen will pop up with two menu options – “Standard Dropdown Menu” and “Simple Mega Menu”.
Select “Simple Mega Menu”.

After adding the Custom Menu on the Landing Page, select the “Simple Mega Menu” option
4. Choose a Mega Menu Template
After clicking “Custom Menu”, you’ll be directed to a library of mega menu
templates.
Find a template you like — and best suits your site — and click it.
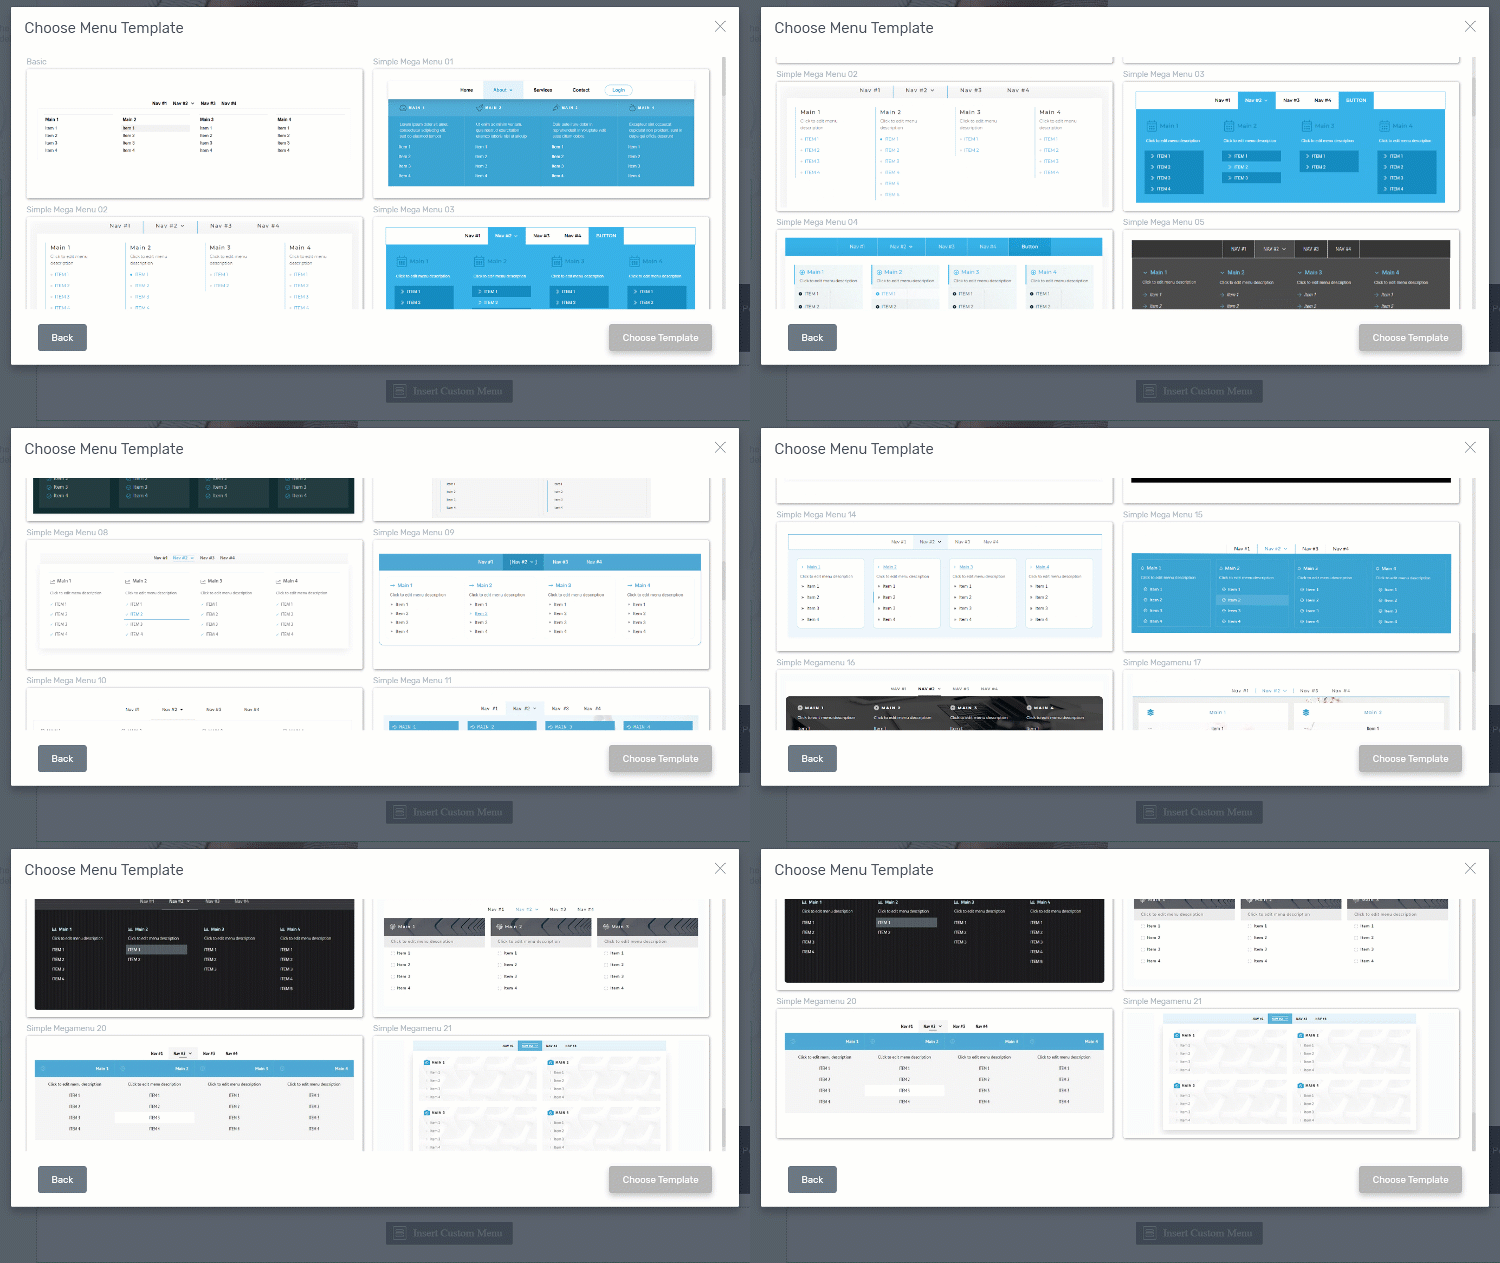
Pick a template for your mega menu, choosing from this library of templates made by our design team
5. Build Your Mega Menu
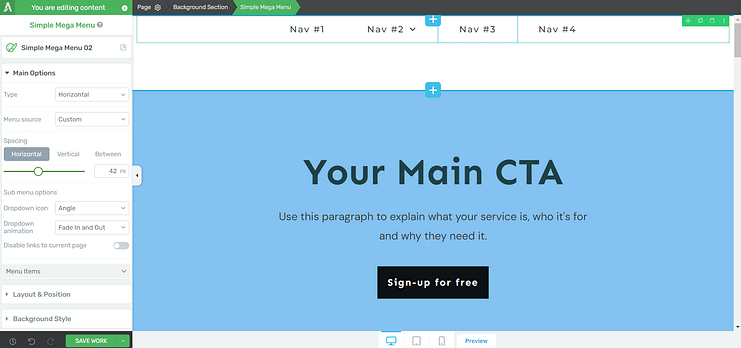
Once your menu template has loaded on your page, it’s time to customize its appearance and configure your mega menu settings. You can do this in two ways:
Click on any part of the menu bar in the visual editor, or
Use the left sidebar
Naming Your Top-Level Menu Items
The first thing you'll want to do is go in and name your top-level menu items. These are the ones that are already visible in the nav menu bar.
To edit a heading, simply click on it. This section will convert into a text editor, where you can type in the name of the heading.
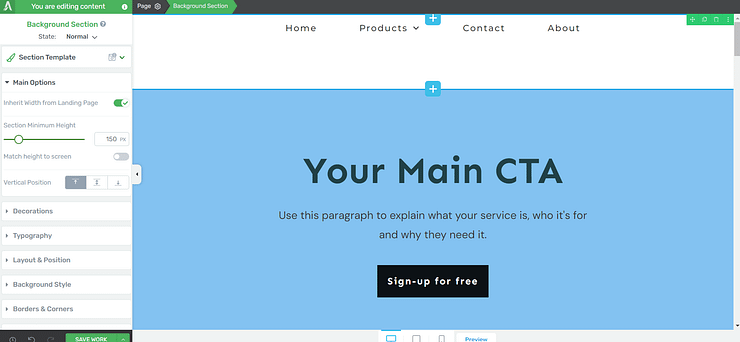
I’ve given my menu items pretty basic names – “Home, Products, Contact, About Us…”
If this menu will serve as your main menu for your website, then you’ll have similar headings to mine.
Editing Your Subheadings
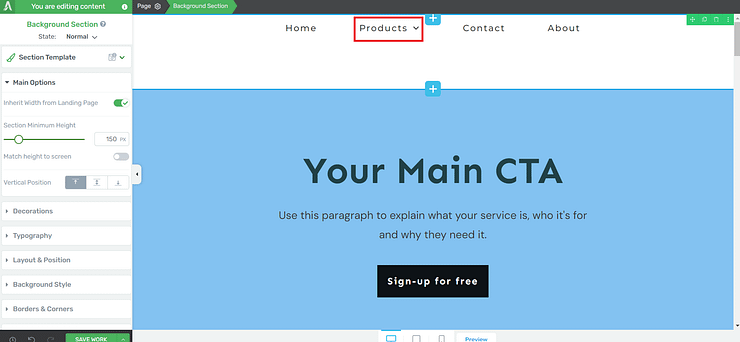
If you take a look at the second heading in the menu layout – “Products” – you’ll see a little arrow right next to it. When you click or hover over this menu heading, a dropdown menu will appear with another menu with its own set of columns.

Editing these subheadings is straightforward.
Click on one of the headings that has an icon next to it and this field will immediately become editable. You can change the name of the field to something relevant to your site.
In the example below, you’ll see I’ve named my sub menu items Outdoor Products, Bedroom Decor, Kitchen Decor, Outdoor Decor, and Children’s Room.
But, that’s not all.
What if you aren’t feeling the icon next to your subheading? Easy fix.
Click one of the headings and look at the default settings in the left sidebar.
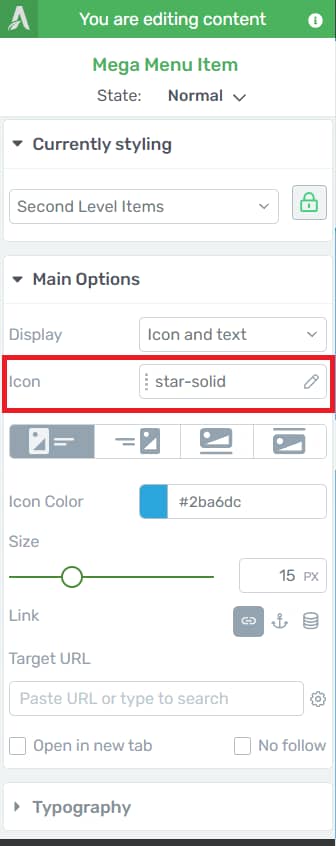
You’ll see an option – “Icon”. Select this option, and a screen will pop up with a large library of icons to choose from.
Find the one you like, select it, and it’ll be applied to all subheadings in the same row. No need to change them individually.
When we say Thrive Architect saves you time, we mean it.
And if you want to change the color of your icons, click the “Icon Color” option and find your desired color.
Everything you need is easily accessible and even easier to use.
Editing Your Sub Menu Items
“Sub menu items” refers to the items that are under your menu’s subheadings. In Thrive Architect, they’re labeled as “Item 1, Item 2, Item 3…”

You can edit their text the same way you’ve edited your headings and subheadings. Click the item in the editor, and change the name.
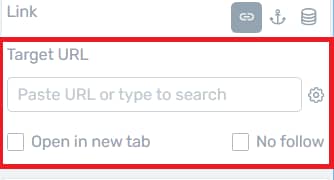
If you need to link these items (or your subheadings) to another page on your website or WooCommerce store, add the page or post’s link to the “Target URL” section in the left sidebar.
Adding Another Dropdown to Your Main Menu
What if you need to create an expandable menu for another heading in your menu? That’s simple to create in Thrive Architect, too.
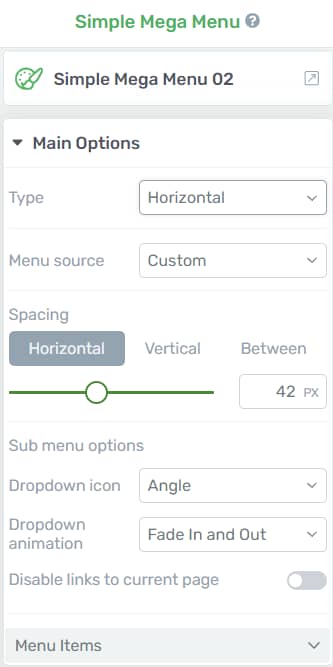
Start by clicking the Simple Mega Menu button/tab in the breadcrumbs section of your page. This is the dark menu at the very top of the editor.
Next, look at the left sidebar and find the “Menu Items” option. This section gives you more granular control over your menu.
You can add a new item and drag and drop it to your desired position. I’ll show you.
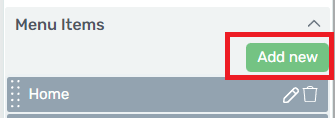
Hit the “New item” button and scroll to the bottom of your menu items in the left sidebar. Your new item will appear. The new item for my menu is “Item 5”.
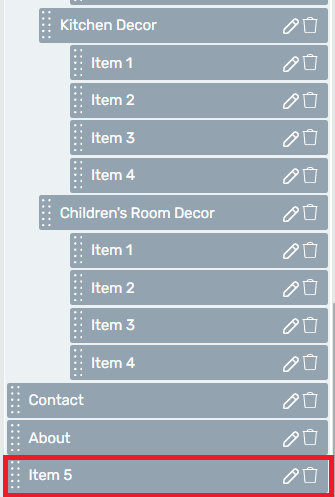
Let’s say I want to add it as a subheading for my “Home” tab. Just drag “Item 5” and place it underneath the “Home” heading, like this:
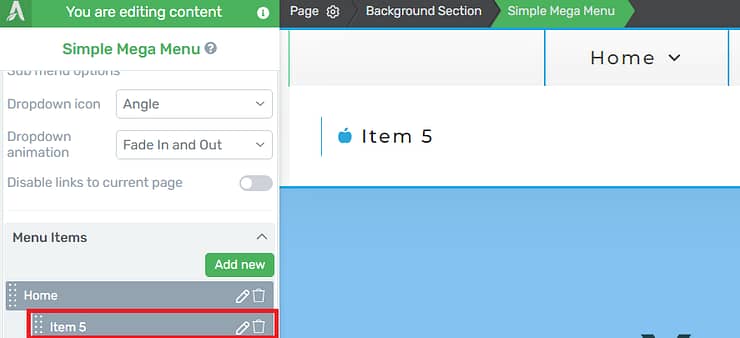
If you look at your actual menu in the visual editor, you’ll notice that the change has already been applied – and it only took a few seconds.
Do you see how easy it is to build complex items like mega menus with this tool? That’s the ease and convenience you deserve when working on your website.
And that’s not all. With the menu settings in the left sidebar, you can make a variety of changes to your menu, including:
Changing your menu’s colors
Setting a new dropdown animation
Adding a shadow to your menu
Choosing your mega menu structure (horizontal or hamburger)
…and so much more
8. Test Your Menu on Different Screen Sizes
Once you’re happy with your menu’s appearance, click “save menu” and view a live preview of your page from different screens to make sure the mobile menu looks good and works well.
Save your changes and there you go. You’ve created your first mega menu.
With Thrive Architect, you get a deep level of customization and design flexibility that you won’t get with a separate WordPress mega menu plugin.
No need to know CSS or HTML. No stress — just easy solutions.
Next Steps: Work on the Rest of Your Site’s Navigation (or Make the Rest of Your Site User-Friendly)
Creating a mega menu is a great start to improving your site's navigation and user experience, but it's just one part of the equation.
To truly make your site user-friendly, you need to consider every aspect of your website's design and functionality.
This includes:
Headers and Footers: Your site's header and footer are prime real estate for navigation and important information. Make sure they're clean, organized, and easy to use.
Page Layouts: The layout of your pages plays a big role in how users interact with your content. Use a clear hierarchy, whitespace, and visual cues to guide users through your pages.
Navigation Menus: In addition to your mega menu, consider how other navigation menus on your site are structured. Are they intuitive and easy to use?
Mobile Responsiveness: With more and more users accessing websites on mobile devices, your site's navigation and layout must adapt seamlessly to smaller screens.
To help you improve your site's user experience, design, and overall effectiveness, check out these four additional tutorials:
How to Create a Mega Menu: Final Words
As you've seen, mega menus can be useful, but the real key to a user-friendly website is in its overall design.
Creating a smooth, easy-to-follow experience for your visitors is about more than just adding a menu. It's about designing your landing pages in a way that guides users through your content easily, keeping them interested and motivated to take action.
This is where Thrive Architect really stands out.
This powerful tool gives you the flexibility and control to create landing pages that not only look great but also work perfectly.
Think of the impact you could have on your conversion rates when you can design landing pages that meet your visitors' needs and guide them towards your goals. Think of the time and resources you'll save by having a tool that makes the whole process easier.
If you're ready to take your landing pages to the next level and create experiences that truly connect with your audience, now is the time to take action.
Get Thrive Architect today and unlock the full potential of your landing pages.


