🧠 TL;DR — How do you create high-quality images for your website (without hiring a designer or slowing your site down)?
Creating professional-looking images for your website doesn’t require Photoshop skills or a big budget. Here’s what you need to know:
Use Free Tools Like Canva or Pixlr: These let you design custom visuals, edit stock photos, or repurpose social media graphics — all without paying a cent.
Try AI Generators for Quick Content: Tools like Microsoft Designer or DALL·E can create image assets from scratch based on simple prompts — great for blog thumbnails, illustrations, or abstract headers.
Source High-Quality Stock Photos (Legally): Sites like Unsplash and Pexels offer royalty-free images you can use for commercial projects — just make sure they align with your brand.
Optimize Every Image You Upload: Use formats like WebP, JPEG or PNG compress files to keep them under 1MB, add descriptive alt text, and enable lazy loading to maintain fast page speeds.
Design with Consistency in Mind: Cohesive visuals (fonts, colors, image style) build trust and improve the user experience. If your pages look like a collage of unrelated content, even great images won’t save them.
Use a Page Builder to Tie It All Together: Tools like Thrive Theme Builder and Thrive Architect help you create beautiful, consistent layouts — and make sure your new visuals actually shine on the page.
You’ll find everything broken down below — with tool tips, design advice, optimization checklists, and step-by-step tutorials to help you confidently create website visuals that are on-brand, lightweight, and conversion-friendly.
Want to create scroll-stopping images for your website — without signing up for expensive design tools?
You’re in the right place.
Most people skim online. In fact, users typically read just 28% of the words on a webpage — meaning your images have to do a lot of heavy lifting. The right visuals can boost engagement by up to 400%, increase views by 94%, and turn a forgettable homepage into one that builds trust instantly.
And it’s not just about aesthetics — it’s about connection. People process images 60,000 times faster than text, and adding a real human face (instead of a stock icon) can increase conversions by 48%. That’s the power of visuals done right.
In this guide, we’ll show you how to:
Design or source stunning visuals (without spending a dime),
Use free tools to make them look polished and professional,
And place them strategically to make your website look trustworthy, engaging, and on-brand.
Grab your coffee, water, or fifth cup of tea — we’re about to overhaul your web design, one smart image at a time.
The Small Picture: Finding/Creating Free Images For Your Website
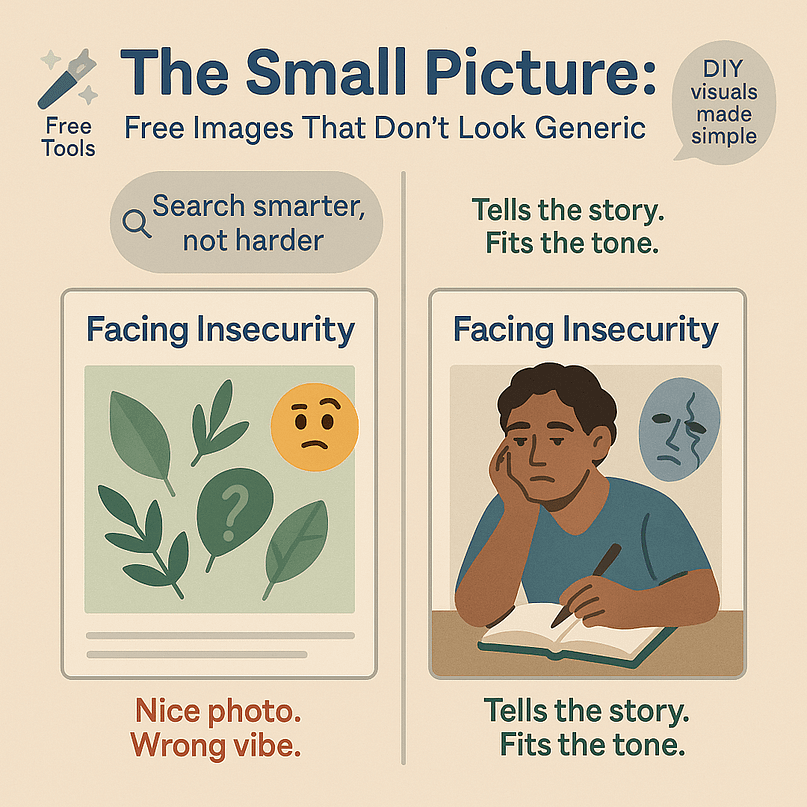
I used to take images for granted. I’d write a thoughtful blog post — let’s say about unpacking insecurity — and then, for reasons I still can’t explain, I’d decorate it with stock photos of leaves. Or flowers.
It looked pretty, sure. But it made zero sense.
That’s the thing about website visuals — they aren’t just there to fill space.
They set the tone, support your content, and influence how your brand is perceived. A mismatched or generic photo can quietly dilute your message — no matter how good your copy is.
But when you’re a small business owner or new blogger working with free website tools, finding on-brand, high-quality images can feel impossible. Especially when you’re trying to avoid cliché stock photos and you’re not a designer by trade.
If you’ve ever asked:
“Where do I find free images that don’t look cheap?”
“How do I create graphics that actually match my blog post?”
“Is there a simple way to design visuals without Photoshop?”
You’re in the right place.
In the next section, I’ll share a few of my go-to solutions — including beginner-friendly graphic design tools, top sources for royalty-free images, and tips for creating your own content-friendly visuals without spending a cent.
Whether you’re designing hero banners, blog thumbnails, or call-to-action graphics — this is where you start.
Methods for Creating Website Images: Really Easy to Do
There’s more than one way to get great visuals on your site — and none of them involve hiring an expensive designer. Whether you’re starting from scratch or customizing templates, here are three solid options:
🧰 1. Use Free Design Tools
One of my main go-tos for free, high-quality image generation is Canva.
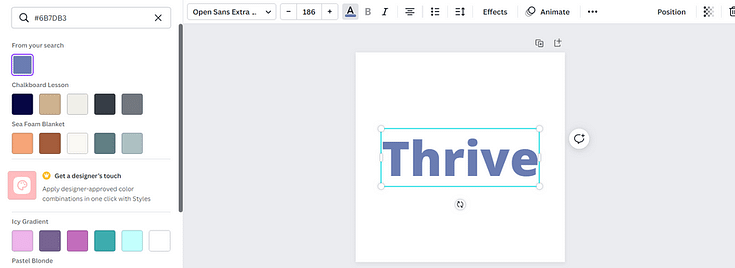
Canva is a user-friendly design tool that lets you tap into the benefits of visually rich pages and content without needing a designer or Adobe Photoshop.
Editing in Canva
You can design a variety of visuals with this tool — infographics, posters for social networks, gifs, slideshows, and more.
If you’re using Canva Pro, you’ll have access to a library of high-quality stock image files.
Some other free image editing tools that you should know about are:
Other great picture editing tools include:
🤖 2. Try AI Image Generators (Optional, But Fun)
For abstract designs, illustrations, or content-based images (like a “businesswoman walking through a city at dawn”), AI can be a surprisingly powerful ally.
Top tools to explore:
Microsoft Designer – Uses DALL·E to turn simple text prompts into polished visuals.
Adobe Firefly – Great for branding assets and styled images.
NightCafe – Offers artistic and stylized looks with various AI models.
These tools work best when you want something unique, conceptual, or highly specific — especially if you can’t find a stock photo that fits.
📸 3. Use High-Quality Stock Photos (Free + Legal)
Sometimes, all you need is the right photo — no editing required.
Here are top sources for royalty-free, commercial-use images:
Unsplash – Clean, editorial-style photography.
Pexels – Great for people shots and real-life moments.
Pixabay – Includes photos, vector art, and even videos.
⚠️ Always double-check usage rights, especially if you plan to use the image in ads or client work.
⚡ How to Optimize Your Website Images for Speed & SEO
You’ve got your visuals — now it’s time to make sure they don’t drag your website down.
Large, unoptimized images are one of the biggest reasons for slow load times and poor mobile performance. They can also hurt your SEO if search engines can’t understand what your images are about.
Here’s how to optimize your images like a pro — no tech headaches required:
✅ Choose the Right Format
Not all image files are created equal.
WebP – Best for most modern websites. It’s lightweight and supports transparency.
JPEG – Use for high-resolution photos or busy visuals. Compress them!
PNG – Ideal for images that need transparent backgrounds (like logos).
SVG – Great for icons and vector graphics. Super sharp, super small.
Bonus: If you’re experimenting with AVIF, it offers even better compression than WebP — but not all browsers support it yet.
🗜 Compress Your Images
Before uploading, shrink your file size — without sacrificing quality.
Try these tools:
🎯 Target file size: Under 1MB. Ideally between 100–500KB for faster mobile load times.
🧾 Use Descriptive Filenames
Instead of uploading something like IMG_3045.jpg, rename your files to something descriptive and keyword-relevant. Example:
✅
homepage-hero-dog-food.webp🚫
screenshot-12-final.jpg
This helps with both on-page SEO and Google Image Search visibility.
📝 Add Alt Text
Alt text makes your site more accessible and gives search engines context.
Keep it short — under 100 characters
Be descriptive and specific
Avoid keyword stuffing
Example:
✅ Golden retriever puppy eating grain-free dog food on lawn
🚫 dog, food, golden, best photo
💤 Enable Lazy Loading
Lazy loading delays image loading until a visitor scrolls to that section of the page — which makes your site load faster upfront.
Most modern WordPress themes and plugins (like Thrive Architect) have this turned on by default. If not, use a plugin like WP Rocket or Smush.
📱 Keep Mobile in Mind
More than 80% of users browse on mobile — and large images can ruin their experience.
Quick mobile-friendly tips:
Use responsive image formats (
srcsetor Thrive’s responsive settings)Don’t upload desktop hero images at full width for mobile
Stick to a 4:5 or 1:1 aspect ratio for product photos or blog visuals
Always test your site on your phone after uploading images
Optimizing images isn’t just about shaving off a few kilobytes. It’s about creating a better experience — faster load times, higher rankings, and a site that looks clean on every device.
The Bigger Picture: Designing an Eye-Catching, Consistent Brand Website Layout
It takes more than good images to make your website look “good”. If you create high-quality visuals and put them on a homepage that boasts conflicting colors, illegible fonts, and a confusing layout – all your DIY design work will go to waste.
You’ll also lose a lot of potential customers because they can’t read anything on your website.
An eye-catching, well-designed website includes consistent branding, intuitive navigation, a user-friendly layout, and high-quality visuals.

While standard WordPress themes provide a basic starting point, they often lack extensive customization options. Attempting to make significant changes through the WordPress Block Editor or theme editor can be both time-consuming and frustrating.
If you don’t have the budget for a web designer, you’ll struggle to create a website that’ll leave your audience going “Wow.”
But you can build an impressive website on your own – and in a hassle-free way. Just not the way you may think.

Instead of relying on a pre-designed theme or grappling with coding, consider exploring the world of no-code tools. Specifically, a WordPress theme builder and page builder combination.
These tools offer a more straightforward and user-friendly approach to website design, allowing you to craft a stunning online presence without the need for extensive technical knowledge.
And we know the best tools to get the job done…
Use a Theme Builder to Create Sitewide Templates
Let’s start with your theme.
Most WordPress themes come with a set of pre-designed layouts that offer little to no customization options.
Themes are convenient because they already come with everything you need to set up your WordPress site. However, you have minimal design freedom.

If you want to make significant changes to your theme’s layout or want to add extra design elements, you’ll have to use HTML and CSS – which isn’t a convenient option for most beginners and busy business owners.
Which is why we recommend using a WordPress theme builder instead.
With this tool, you can build custom elements like headers, footers, page templates, and more – without having to type a single line of code.
And we know the best tool for the job – Thrive Theme Builder
Thrive Theme Builder helps you create a custom WordPress theme you can easily tweak or customize in a few clicks.
Through the 2-minute Thrive Theme Builder Setup Wizard, you can select templates for your headers, footers, blog posts, pages, homepage, WooCommerce pages, and more.
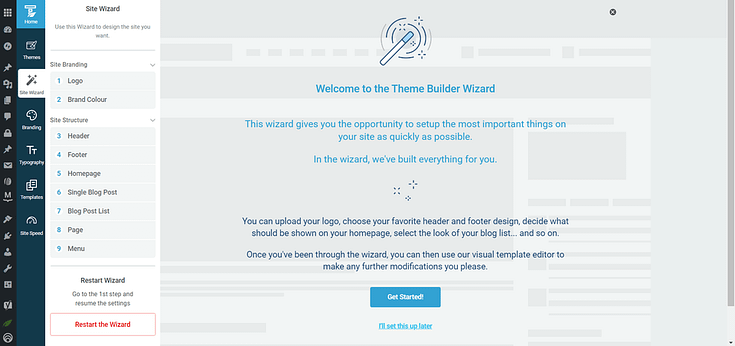
Setup the wizard in Thrive Theme Builder.
There is also a template section that allows you to create custom post types (and page types).
This space is where you’ll edit standard WordPress pages – e.g. your site’s Error 404 page.
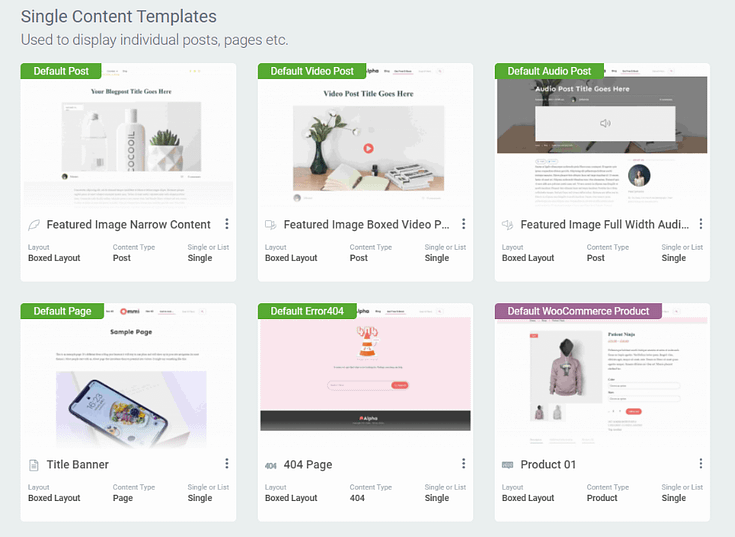
After you’ve created your customizable templates and finalized your site’s overall structure, you’ll need to hop in and add copy, and the images you took the time to find and/or design.
Instead of trying to make this happen with the WordPress Block Editor (Gutenberg) you should use a page builder instead.
Customize Your Webpages With a Page-Building Plugin
A page-building plugin, when used in conjunction with a theme builder like Thrive Theme Builder, super simplifies and optimizes the web designing process.
While Thrive Theme Builder sets up your overall site structure, a landing page plugin makes it 100x easier for you to customize your site’s individual pages.
This means you can tailor each page to suit specific needs while maintaining the overall aesthetic set by the theme builder.
And if you make Thrive Architect your page-building plugin of choice, you won’t need to worry about compatibility issues with Thrive Theme Builder.
These two plugins are designed to work seamlessly with each other.
Thrive Architect is known for its user-friendly, advanced drag-and-drop “edit screen” that helps website owners – with any level of technical experience – create a stunning, professional site.
With this particular plugin, you have a vast selection of customizable landing page
templates and design elements to help bring your creative vision to life.
No need to code or use several plugins to achieve what you want.
Thrive Architect’s landing page library is one of its main winning features, boasting hundreds of templates you can use to create all kinds of pages to promote your offers, secure leads, and convert visitors into customers.
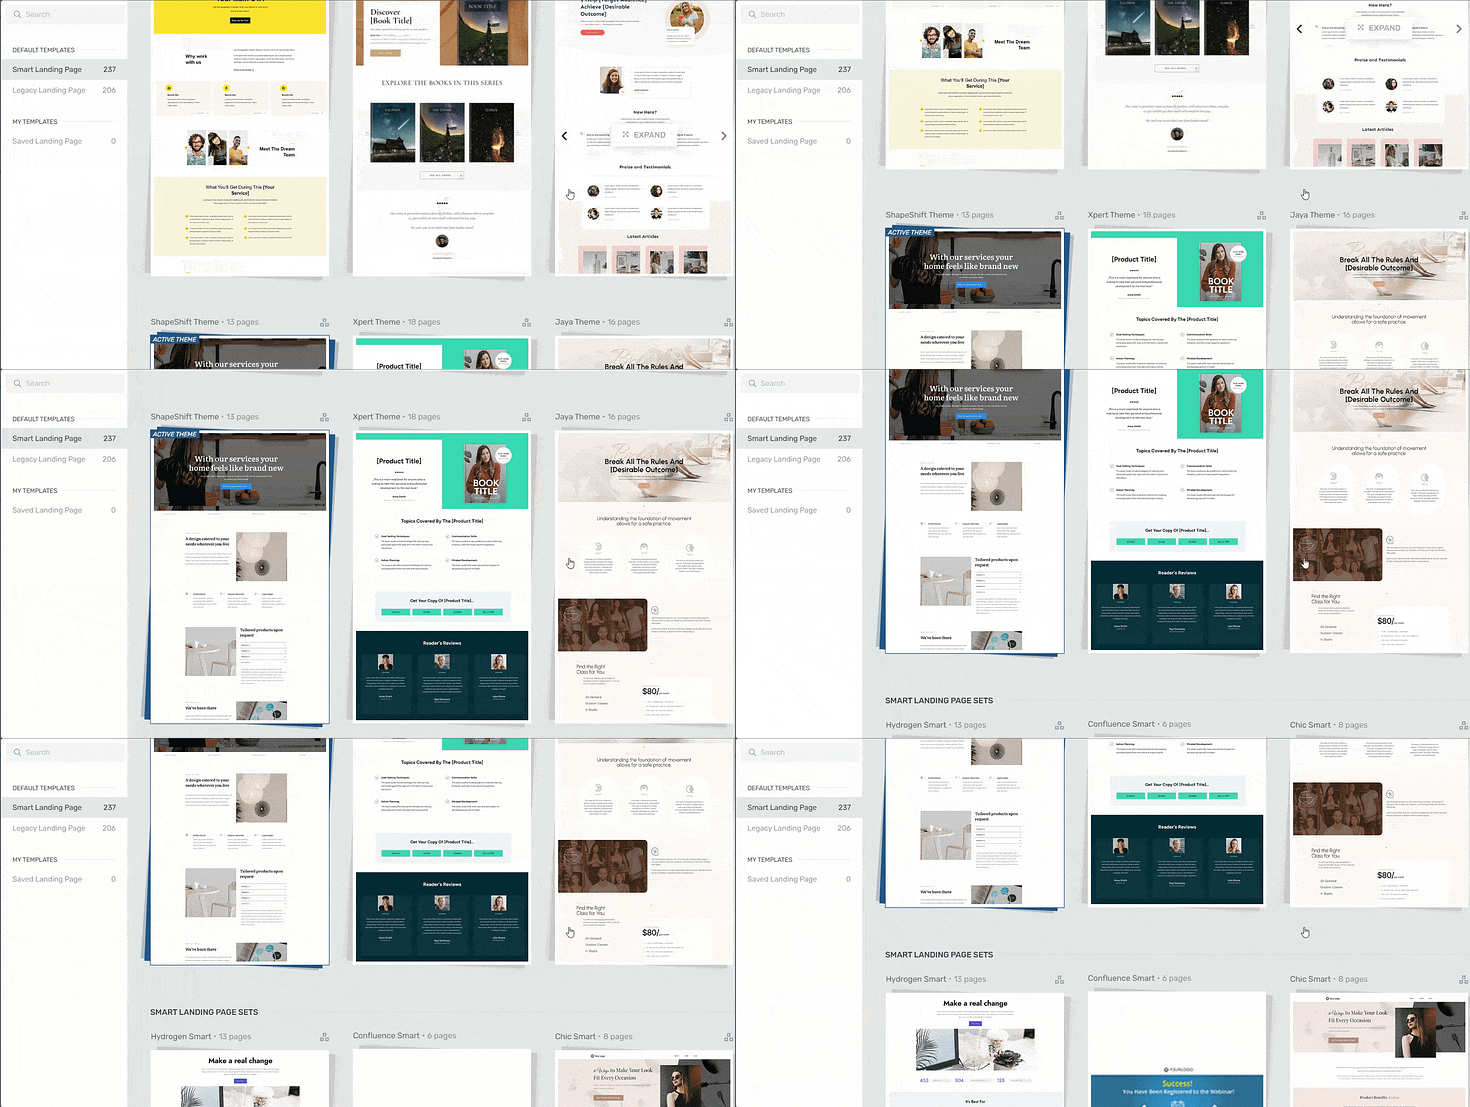
Landing page template sets in Thrive Architect
These templates are fully adaptable and automatically sync with the global aesthetics set by Thrive Theme Builder.
See? Seamless design.
In line with Thrive Theme Builder, Thrive Architect also focuses on creating SEO-friendly pages, ensuring that your site not only looks great but is also optimized for search engines.
This page-builder also features built-in mobile optimization features to help you create a responsive design your audience will love.
Tutorials for Creating Pages and Posts That Look Great
Next Steps: Optimize Your New Images
Once you’ve created your images, you’ll need to optimize them so they don’t hamper your webpage’s loading speed.
There are a variety of free tools you can use to optimize images for your WordPress website, including:
TinyPNG
Image Resizer
Most of these tools are useful for resizing images like stock photos, screenshots, etc. And you can edit most file types (jpg/jpeg, png, webp, etc.)
But, if you’re a Thrive Theme Builder user, you can use the plugin’s built-in image optimization features to automatically optimize all images in your gallery.
How to Create Images for Your Website: Final Words
So, as you can see, creating the right visuals for your website isn’t just about aesthetics. It’s about communication, engagement, and making your brand memorable.
Designing or downloading images for your site is one step, but if you want to create a great visual experience for your visitors you’ll need to think bigger.
Is your website, as is, communicating your brand’s message clearly? Are you happy with your current web design?
Will your new, high-quality images add value to your current site, or will they be overshadowed by its janky design?
Take some time to evaluate your website, identify areas of improvement, and schedule time to redesign it if necessary.
And if you need a new set of tools, take a look at Thrive Theme Builder and Thrive Architect, like we recommended.
You won’t regret it.


