Are you looking for a straightforward way to create a custom header for your website?
With most themes, you’ll need to dive into your theme template file and attempt to add custom code or wrangle various files to try and make this happen — and if you aren’t well-versed in coding, this won’t end well.
But there are much easier ways to get this done — and we’ll show you.
Creating a well-designed custom header is important — it sets the tone for your visitors’ overall experience. But you need to ensure that your website looks just as good as the header you’ve worked on.
Keep reading to learn the best way to create a WordPress header (and website) your audience will love.
Your WordPress Header Is Important…But Don’t Overlook This Big Detail
Having a well-designed header is important. It’s the first thing most of your website visitors will see and use to navigate your website.
Every element matters – font choice, background color, spacing and even logo placement. But it’s important to remember that your header is one part of a much larger picture.
The bigger picture is your entire website's harmony and navigability. A well-designed header on a cluttered, confusing website is like a beautiful door on a disorganized house.
Your visitors might have a good first impression initially, but if they can't easily find what they're looking for, they’ll lose interest and drop off without engaging further.
There are 3 ways to customize your header, but only one of these options can guarantee an impressive, overall design and user experience.
We’ll break this down throughout the guide.
Option 1: Customize Your Header in the WordPress Theme Customizer
Most popular WordPress themes let you use the default theme customizer in the WordPress dashboard to make changes to the header area of your WordPress layout.
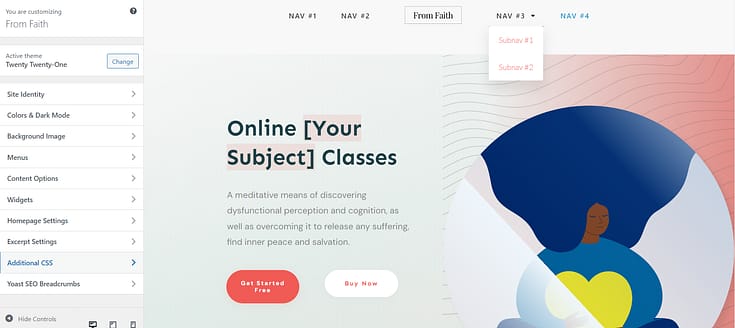
You should start by navigating to Appearance » Customize in your WordPress admin area.
Your theme may add a ‘Header’ section to the customizer, or add default header options under the
‘Color’ section, but this varies from theme to theme.
The design options here are also very limited.
Plus, some themes, like Twenty Twenty-One and Twenty Twenty-Two, do not offer header customization options at all.
In this case, you’ll need to use a theme builder or page builder to create a custom header.
Option 2: Customize Your Header in the WordPress Full Site Editor
WordPress recently added full-site editing to WordPress in version 5.9. If your theme supports the new feature, you can use this editor instead of the theme customizer.
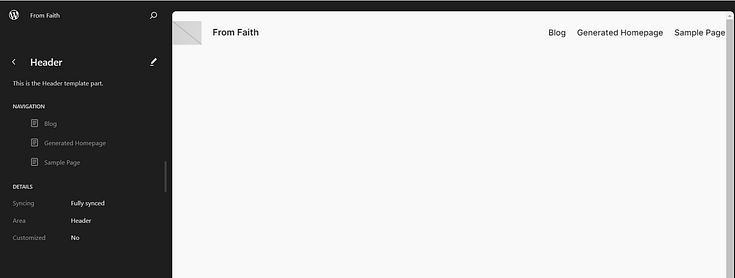
When you use a compatible theme, you can customize your header by navigating to Appearance » Editor. This will launch the full site editor, which is just like the block editor you use to write WordPress posts and pages.
However, at this time there are only a few themes that work with the full site editor – like Twenty Twenty-Three and Twenty Twenty-Four.
So if you’re using a different theme, this option might not work for you.
When you click the header, you will notice the name of the template at the top of the page changes to ‘Page Header’.
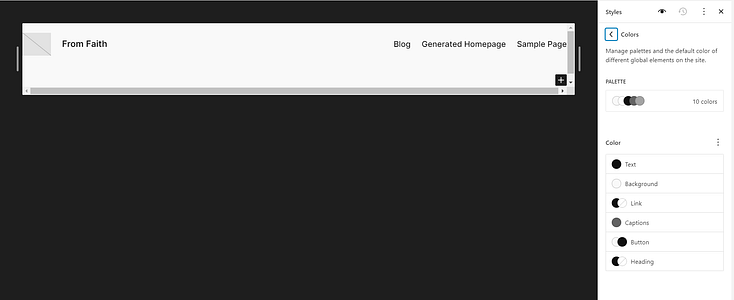
From our experience, using the Block Editor to customize your header is quite restricting and not as straightforward.
Leaving you with having to purchase an additional design tool like SeedProd or Elementor Pro to customize the theme — which might not yield your desired results.
Which brings us to option three…
Option 3: Create a Header & Site Layout with Thrive Theme Builder and Thrive Architect
As we said earlier, having a nice header is great but it needs to match the rest of your site. This option allows you to create a stunning header (without tampering with your header.php file or other theme files) and a great overall web design to match.
1. Download & Install Thrive Theme Builder + Thrive Architect
Thrive Theme Builder & Thrive Architect are the best WordPress site builder duo in the market.
Think of this WordPress plugin combo as “web development made easy”. No need to tamper with HTML, CSS, or any other code.
If you want a custom WordPress theme to make your website stand out – you need Thrive Theme Builder.
Thrive Theme Builder helps you build and customize every aspect of your website design – including your header – without typing a single line of code.
You get access to pre-built, one-click templates to build a clean, SEO-optimized website that search engines will love — without wasting time creating complicated designs from scratch.
The best part? You can have all of this set up in minutes.
And once you’ve created your website’s structure, you’ll hop in and customize your web pages with Thrive Architect, our landing page plugin.
This page builder features drag-and-drop functionality for easy building; and a large selection of templates you can use to create unique web pages.
No need to code. No need to purchase expensive add-ons. You get everything you need to build a great header/footer – and an impressive website.
2. Select a Theme
Thrive Theme Builder comes with a selection of professionally designed premium themes, complete with conversion-focused pages and block templates for every part of your website.
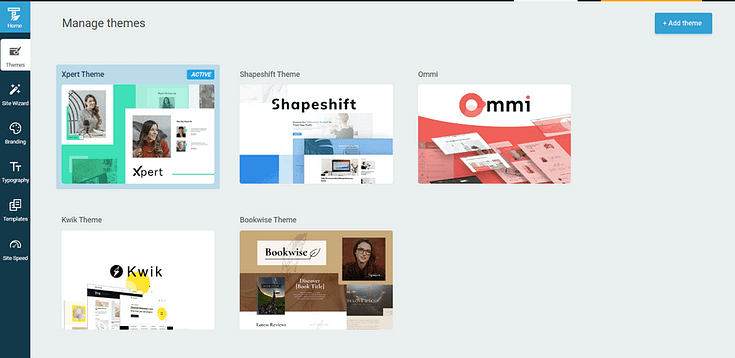
Some of our themes were built with specific niches in mind – like yoga and online coaching – but they still work super well with any other type of website.
Every theme is fully customizable, allowing you to create a unique website design to impress your site visitors and stand out from the competition.
And it gets better with our Thrive Theme Builder Setup Wizard...
3. Select a Site Header Template in the Thrive Theme Builder Setup Wizard
The Thrive Theme Builder Setup Wizard is the key to creating your website’s structure. While you can skip ahead to the header section to select a template, we recommend following the wizard step-by-step to create a cohesive design for your entire site.
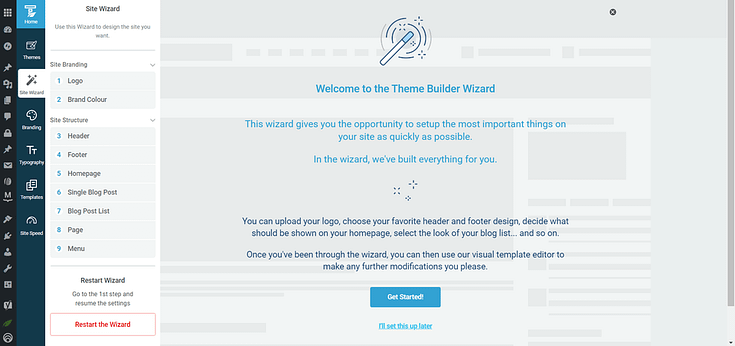
Setup Wizard in Thrive Theme Builder.
That way, your new header will blend in with the rest of your website and look just as good.
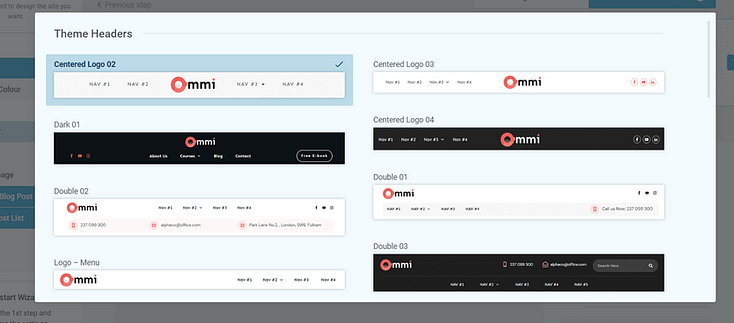
When you reach the “Header” section of the wizard, scroll through the different header template options and choose one that best fits your design needs.
4. Find the “Homepage” Template in the Templates Section
After you’ve completed the Setup Wizard, select the “Templates” tab in the Thrive Theme Builder dashboard. This is where all your core page templates live – homepage, blog post template, blog post list template, and more.
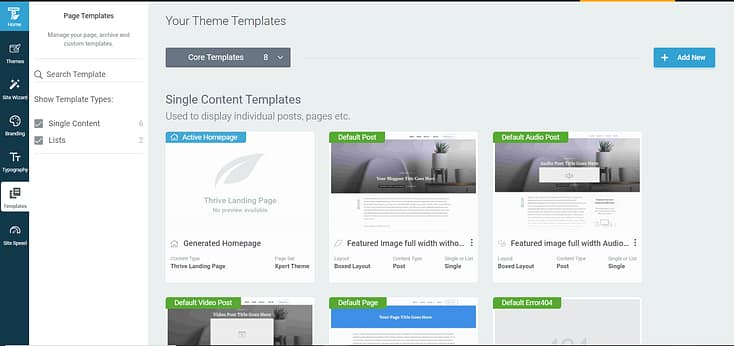
To begin creating your custom header, you’ll need to access your theme templates. By default, the header is used on different page
templates; updating your header on one template will update the header throughout your site. An easy place to start is your Homepage.
Hover over the “Generated Homepage” template and select “Edit Landing Page”.
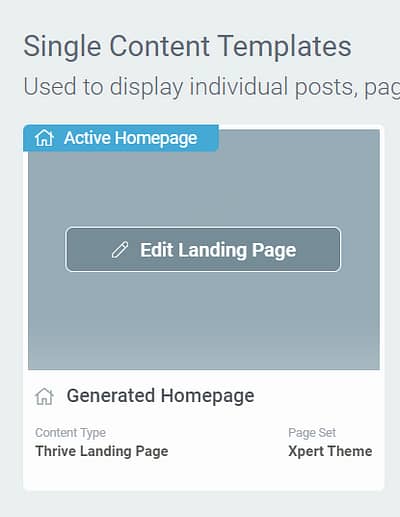
You’ll redirected to Thrive Architect’s drag-and-drop editor where you’ll customize your header.
5. Customize Your Header Section
In the visual editor, hover over your header and click it.
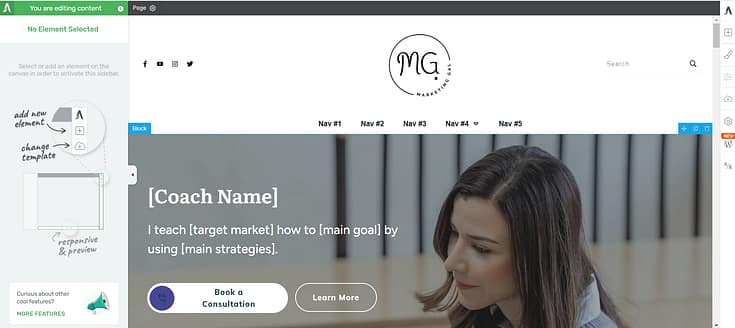
A new menu will appear in the left sidebar, giving you various customization options. Scroll to the bottom of the menu and select “Edit Header”.
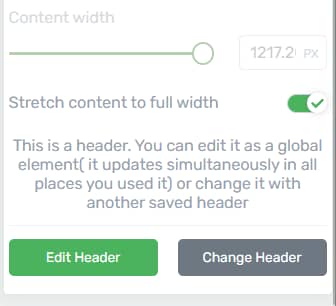
And now it’s time to customize the header to your heart’s content! Use the drag-and-drop editor and the “Add Element” button to view the available elements and add new ones to your header.
Make additional customizations using the sidebar on the left-hand side of the page.
Make sure your website header has:
- Your business logo and site title
- A clear navigation menu (e.g. dropdown)
- Call to Action Button (e.g. a click-to-call button)
- Additional navigational elements like social media icons, search bar, tagline, WooCommerce cart button, etc.
If you want to be creative you can even add a widgets area or a background image to your header — but be sure that this doesn’t compromise the overall design.
Once you’re happy with your header design, click “Done” in the left sidebar, save your work and exit the visual editor.
Thrive Tip
With headers, less is often more. Before you throw in features like a header image, animations, or a toolbar, be sure that it’s completely necessary. Your header must be easy to read and even easier to navigate — on all devices.
Next Steps: Design and Customize the Rest of Your Site
After you’ve designed and customized your header, you should start working on the rest of your page templates.
Using Thrive Theme Builder and Thrive Architect to design your WordPress website with templates is a breeze and you’ll see that for yourself.
Here are four more tutorials to help you create an impressive website to match your stunning header:
Are You Ready to Design Your Custom WordPress Header?
Your website's header plays a major role in providing information and navigation options to your visitors.
With Thrive Theme Builder and Thrive Architect, you can create a well-designed header and web design to make your business stand out.
That way, you don't need to worry about using several different tools plus an external theme to try make this happen.
Instead you get 2 plugins (which you can purchase as one bundle) to create a stunning header, footer, home page, blog page, and so much more.
So, why not give Thrive Theme Builder and Thrive Architect a try?


