Tell me I’m not the only one who Googles herself from time to time.
(It’s called personal brand management, okay?)
When I do it, the first few results are my personal branding website, my LinkedIn, and a couple of TEDx talks I gave back in my third year of university (yes, that TED). Strangely enough, those exact links helped me land my first real online opportunities — while I was still in school. And things took off from there.
That’s the thing about having a personal branding website: it works for you when you’re not in the room.
And if you don’t have one yet? You’re already behind.
70% of employers check your online presence before making a hiring decision. 84% of consumers trust businesses more when their founders have a visible personal brand.
(Source: DSMN8)
So whether you're applying for jobs, freelancing, launching something new — or just tired of blending in online — now is the time to take control of your narrative.
In this guide, I’ll show you how to build a personal branding website that’s simple, strategic, and actually moves the needle — using tools I trust from my own stack.
Let’s get into it.
Why You Need a Personal Branding Website
Serious question time:
If someone Googled you right now… would they actually find the version of you that you want them to see?
Because let’s be honest: that matters more than we’d like to admit.
Now, here’s something you might not expect: despite working in content, design, and all things visibility, I’m not the type who loves putting myself out there 24/7. I don’t share every milestone, and I’m not always in the mood to be “on.” If you feel the same, I get it.
But even if you’re not chronically online, people are still searching for you. That’s just how it works now. And the question is: what are they finding?
The reality is, your online presence is often your first impression. And not having a space that reflects your work, values, and vibe? That’s a missed opportunity.
Let this sink in:
- 48% of people say a website’s design is the #1 way they judge someone’s credibility
- 75% admit to making snap judgments about businesses (and people) based solely on their website
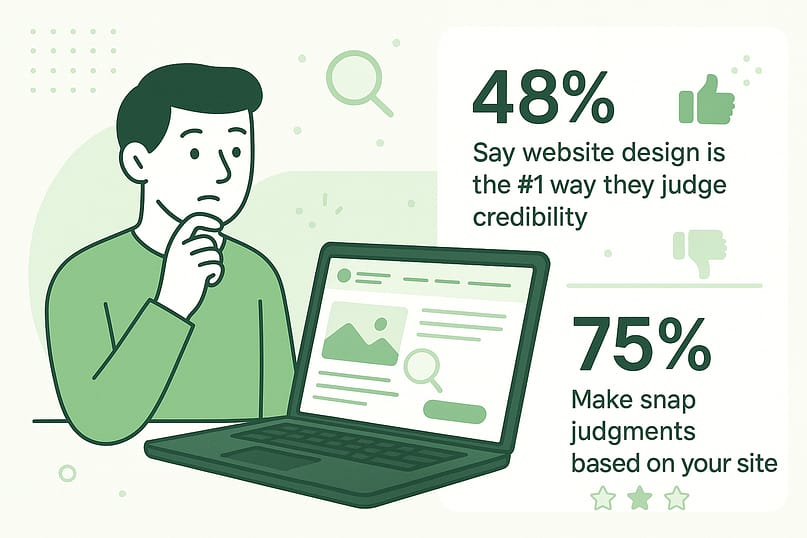
So whether you're freelancing, job hunting, building a business, or just trying to create a more intentional online identity — a personal branding website helps you show up with confidence and clarity.
Here’s what it lets you do:
Build your personal brand online in a way that feels true to you
Stand out online in a crowded space
Create a personal website that reflects your style, voice, and goals
Showcase your work, testimonials, and past projects
Design your personal brand around what makes you valuable
Give visitors a reason to stick around — and a way to get in touch
Think of it as your digital home base — a place to control your narrative, highlight your strengths, and guide people toward the next step (whether that’s contacting you, hiring you, or just remembering your name).
Because at the end of the day, your personal homepage might be the only “hello” someone gets before they make a decision. Let’s make sure it’s a good one.
Top Personal Branding Website Examples (and What Makes Them Work)
Before we dive into the techy stuff, let’s get inspired.
A great personal branding website doesn’t need to be flashy or complicated — but it does need to be intentional. These three examples show how different styles, professions, and personalities can shine online while still ticking all the right strategy boxes.
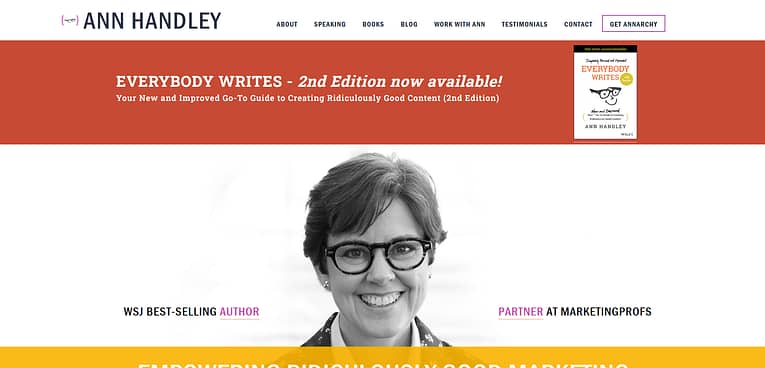
Ann Handley is one of the reasons I became a better writer. Her book Everybody Writes should basically be required reading if you create content and her website reflects everything she teaches.
It’s smart, warm, and completely human. From the dog cameo on her About page to her wonderfully nerdy newsletter signup (“Total ANNARCHY”), everything feels like her — voice, humor, and all. But it’s not all fluff: you’ll also find her speaking reel, portfolio, and ways to work with her clearly outlined.
What to steal:
✔ A strong, consistent tone of voice that matches your brand
✔ A photo that looks like the real you, not a stiff headshot
✔ Playful CTAs and copy that sound like a human, not a robot
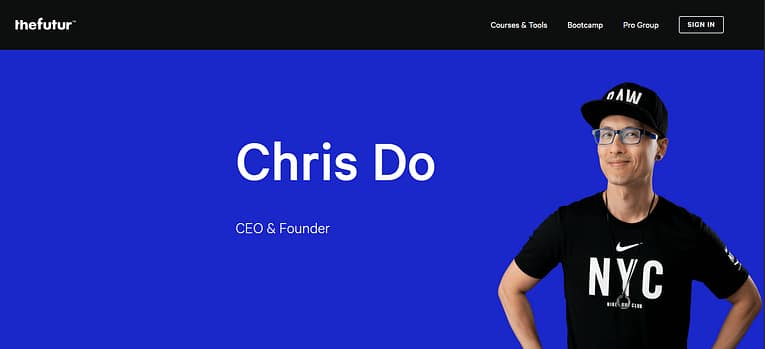
Chris Do helped me survive my visual media degree — truly. I’ve been following him since the days his site declared, “I help creatives make money doing what they love.”
These days, that bold line’s gone, but the mission is still loud and clear. His site now leads you into The Futur: a hub for creative entrepreneurs packed with masterclasses, coaching, and resources to help you build a brand and a business.
What to steal:
✔ A brand that evolves with you
✔ Authority through valuable, well-structured content
✔ A site that feels serious but never stiff
Your personal branding website doesn’t have to be perfect — it just has to feel like you and give people a reason to stick around.
And yes, you can build something just as clear, beautiful, and strategic using tools that don’t require a design degree. I’ll walk you through exactly how in the next section.
How to Build Your Personal Branding Website on WordPress
(Using tools I actually use — and recommend)
So, you’re ready to create a personal website — one that actually reflects who you are and opens the right doors.
Before we jump into the step-by-step, here’s a quick gut check: your site doesn’t need bells and whistles. It just needs to be thoughtfully built, aligned with your goals, and easy to navigate — the kind of site that makes someone say, “Ah, I get what they do,” within a few seconds.
Here’s what you’ll want to include as you build your online identity:
- A headline that clearly says who you are and what you offer
- An About section that sounds like you and builds connection
- A space to showcase your work — portfolio, projects, or wins
- A few testimonials or quotes to build credibility
- Contact info that’s easy to find (no scavenger hunts)
- A clear next step — whether it’s joining your list, booking a call, or downloading something helpful
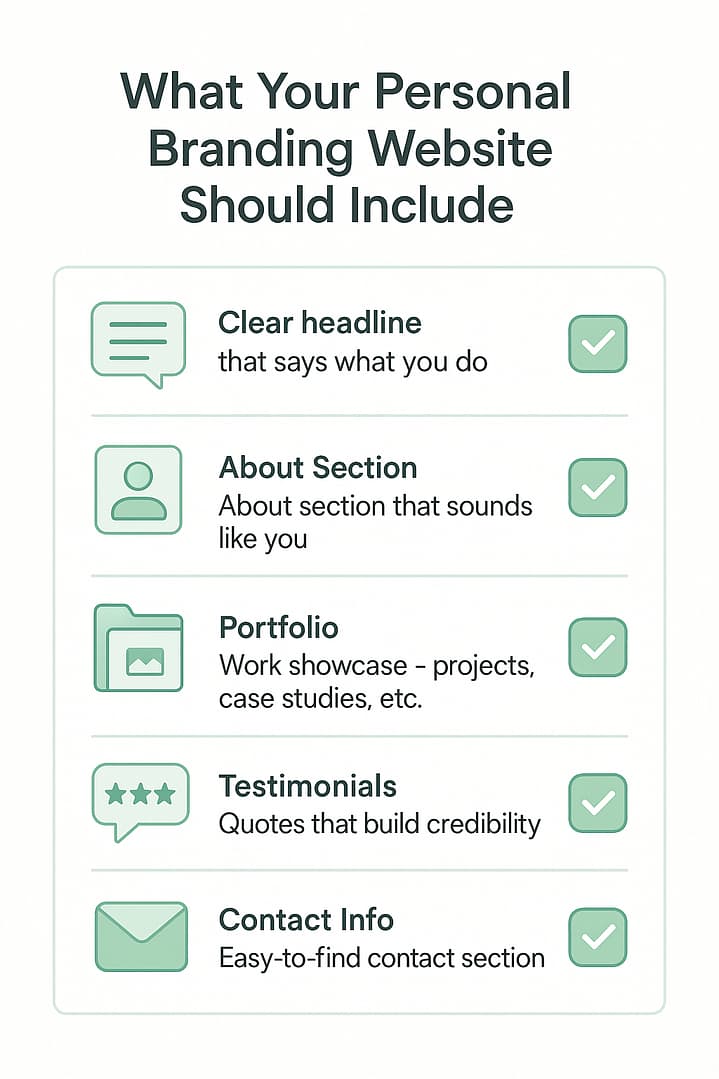
Once you’ve got these essentials, you’ve got a professional website that can do serious work behind the scenes — helping you stand out online, attract opportunities, and grow your personal brand on your own terms.
We’ll be building our website on WordPress, so you’ll need to purchase a domain name, choose a web hosting provider (which you can learn more about here), and complete the WordPress installation process.
Once you’ve got that done, you can hop into this step-by-step tutorial:
1. Install Thrive Theme Builder and Thrive Architect
Want to create a standout website for your personal brand?
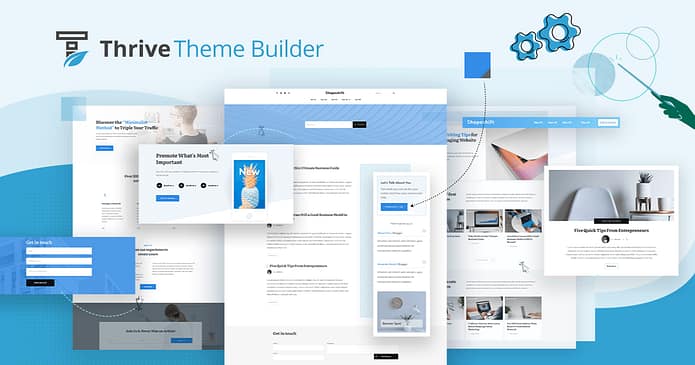
Thrive Theme Builder and Thrive Architect are the website builder duo you need to make this happen.
With Thrive Theme Builder, you get to build a personalized website structure in a few minutes. You have complete control over every aspect of your website's design, from color schemes and fonts to layout and styling.
Thrive Architect allows you to drag and drop elements to create impressive pages quickly. No coding needed! You can easily add a variety of engaging elements to showcase your skills, portfolio, or services, putting your personal brand in the spotlight.
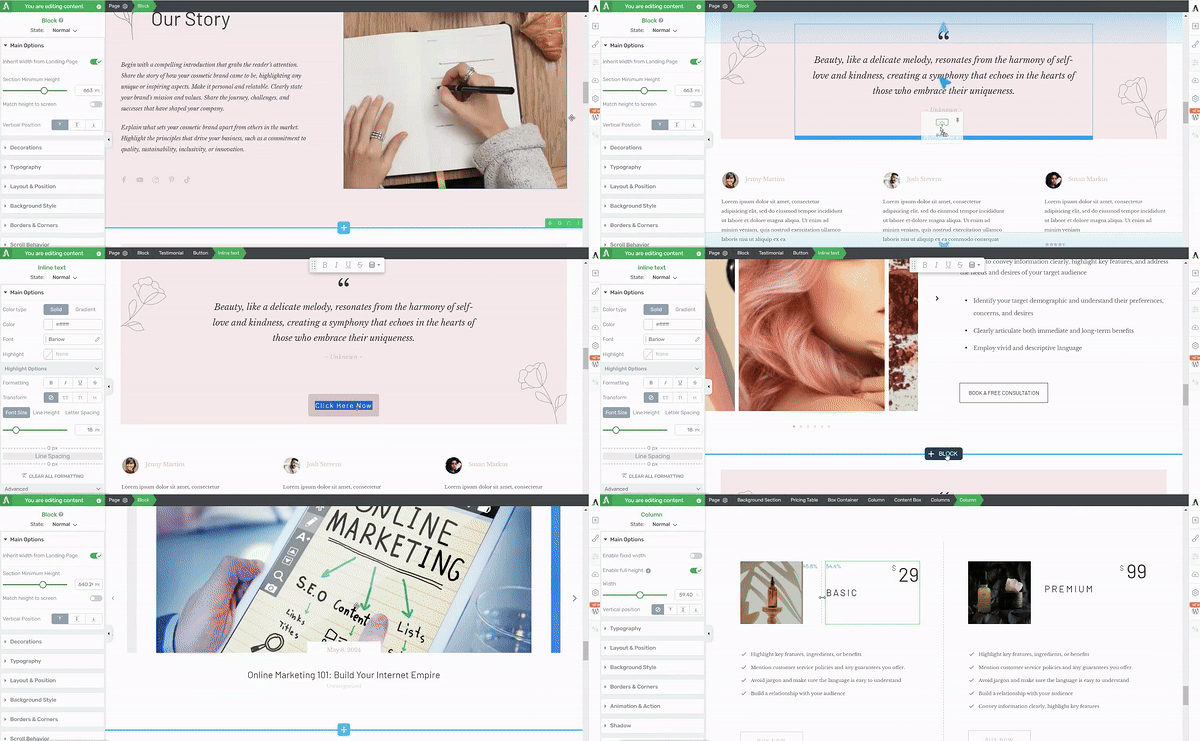
Thrive Architect in action
The best part? These tools are designed with non-technical users in mind. Whether you're new to WordPress or an experienced user looking for efficiency, you can create a professional-looking website that sets you apart from the crowd, all by yourself.
Take charge of your online presence with Thrive Theme Builder and Thrive Architect. These tools make it simple to build a website that not only looks great but also helps your personal brand grow and attract opportunities.
2. Activate & Launch Thrive Theme Builder
Thrive Theme Builder helps you create your website’s structure in less than 10 minutes.
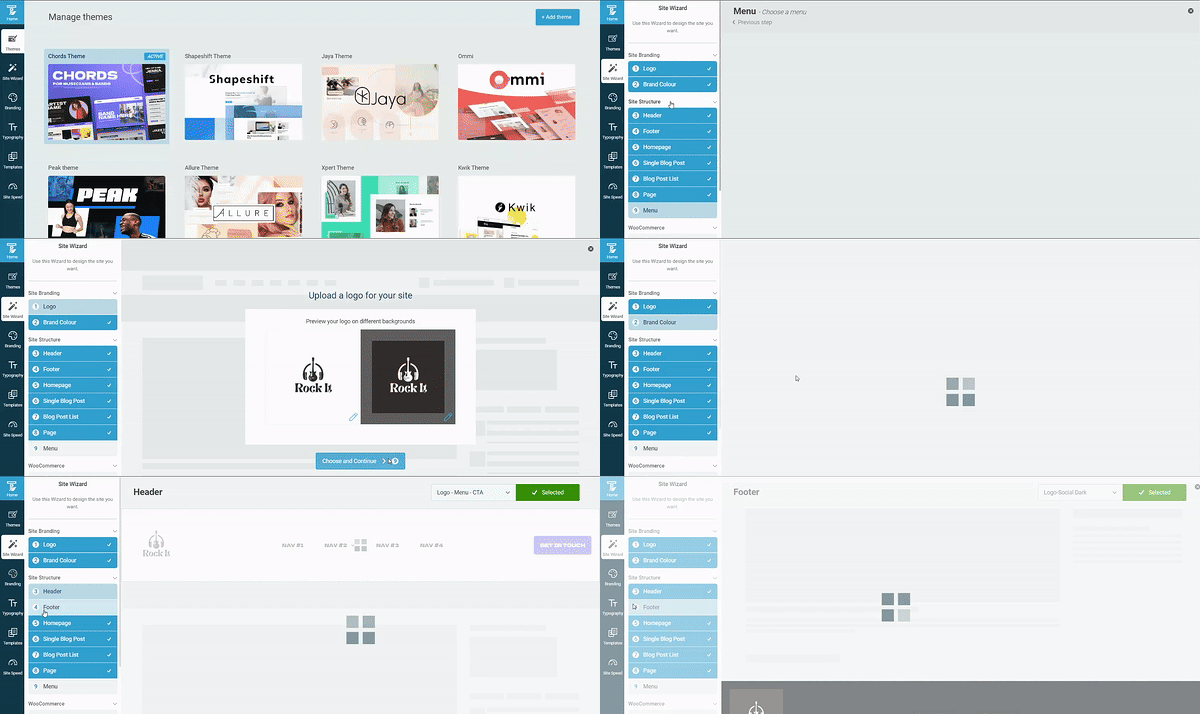
Thrive Theme Builder in Action
Once you’ve installed and activated Thrive Theme Builder, you’ll need to select a theme for your website.
Each theme comes with a set of fully-customizable, high-quality
templates that are perfect for your small business or brand.
A couple of our recommendations are:
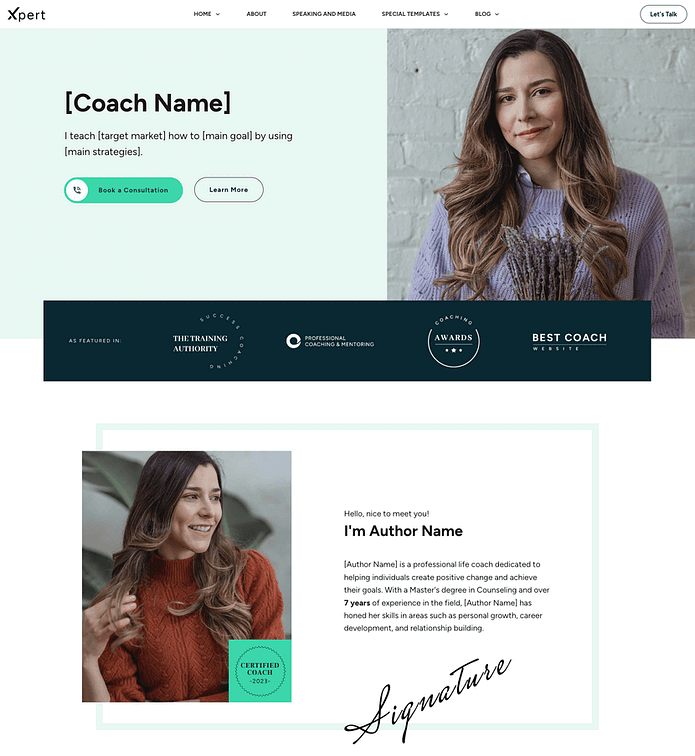
Xpert, a sharp theme for consultants, coaches, strategists, and other people-oriented entrepreneurs.
Ommi, a warm, aesthetic multi-purpose theme that’s great for business owners, job-seekers, or thought leaders in a variety of niches.
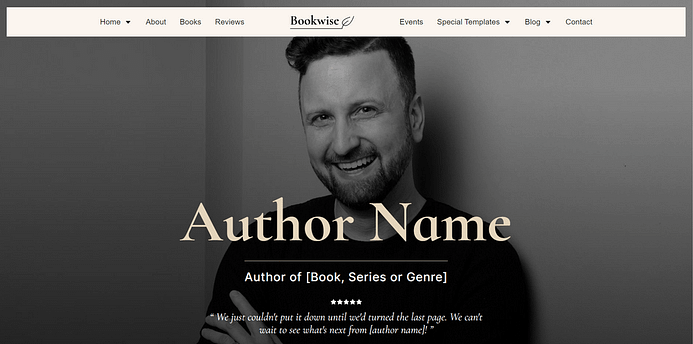
Bookwise — the perfect theme for authors and independent writers.
And so many more.
The best part about these themes, though, is the fact that you can use any theme to build your website.
So, if you want to use a theme like Allure, for example, which was “originally” designed for beauty and cosmetics brands — you can hop in and turn it into an elegant design for your own personal brand.
Like we said — total design control.
Pro tip
You’ll be happy to know that our templates are mobile-friendly and built with search engine optimization (SEO) in mind, giving you a head start in getting your website to rank.
3. Set Up Your Site Structure in a Few Clicks
The Thrive Theme Builder Setup Wizard helps you select all the web page templates, a color palette, and fonts you need for your clean web design—and it only takes a few minutes to do this.
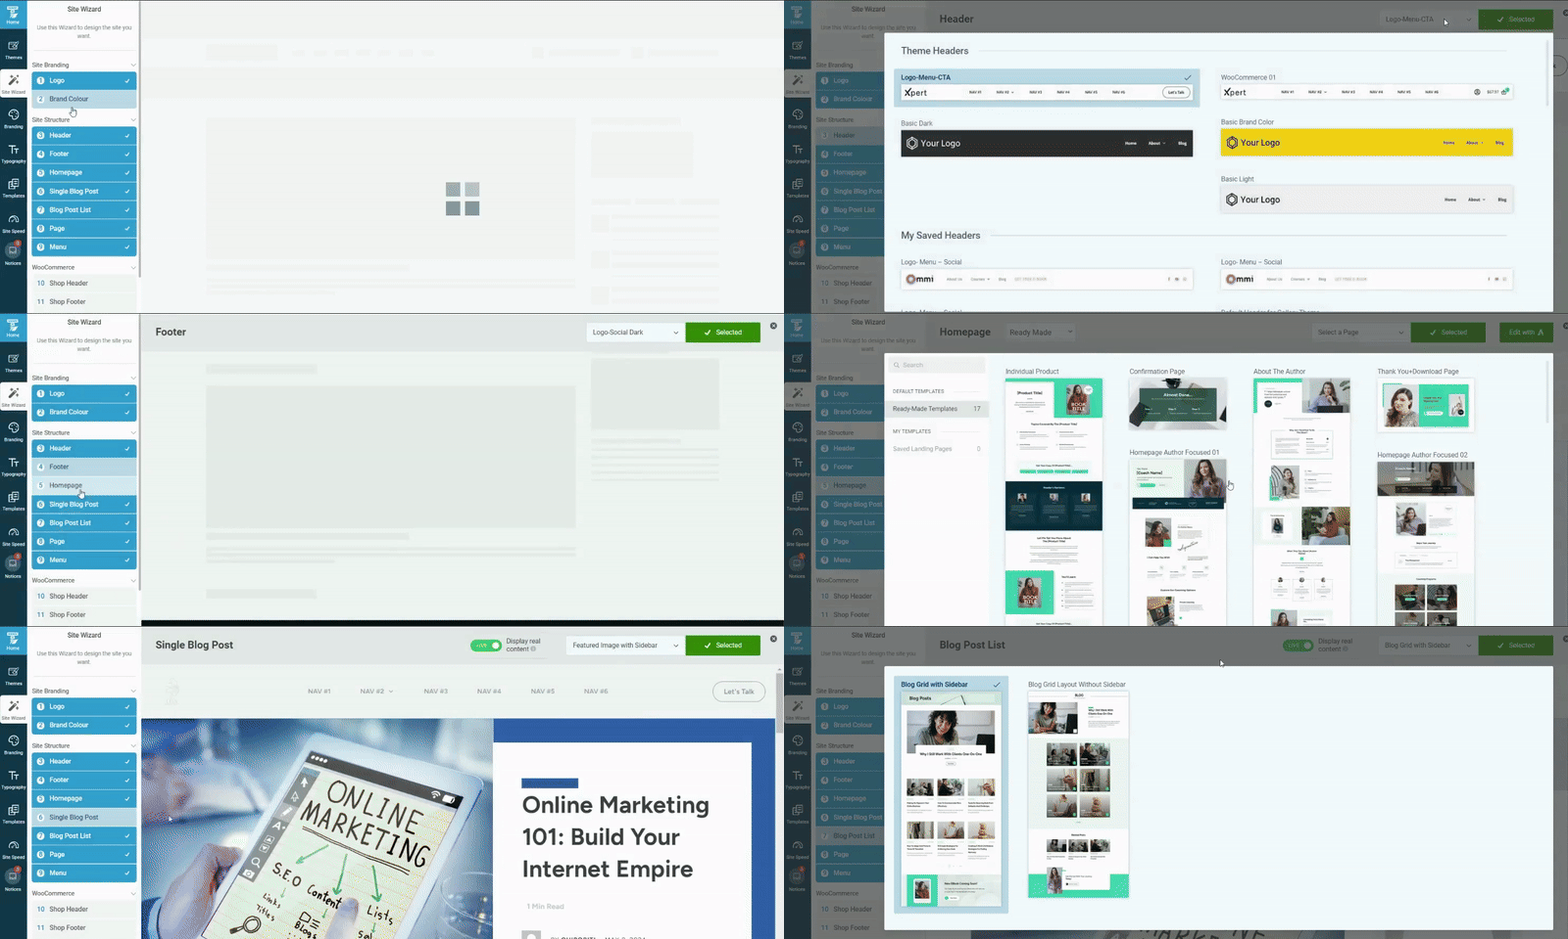
Thrive Theme Builder in Action
This wizard walks you through setting up the following:
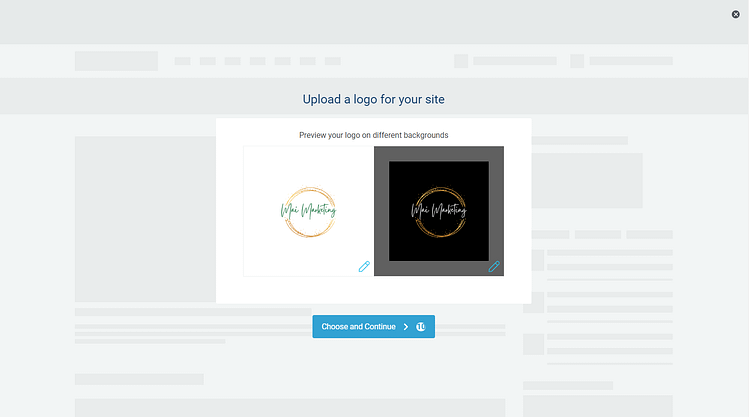
A sitewide logo for light and dark modes
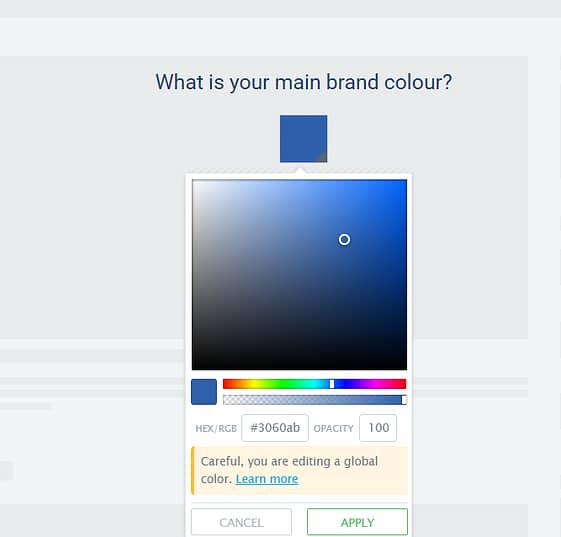
Create your entire site’s color scheme by choosing your primary brand color. (This color scheme will automatically appear on all your website templates, fonts, blocks, etc.)
A conversion-focused header for straightforward site navigation.
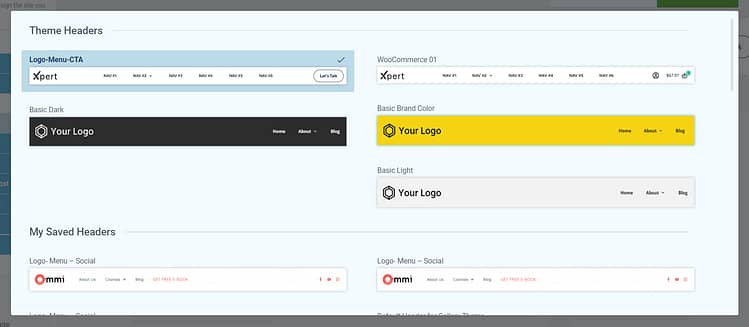
A focused footer to add contact information, your business address, links to social media platforms (Facebook, X, LinkedIn...), etc.

The perfect homepage
template for your site.
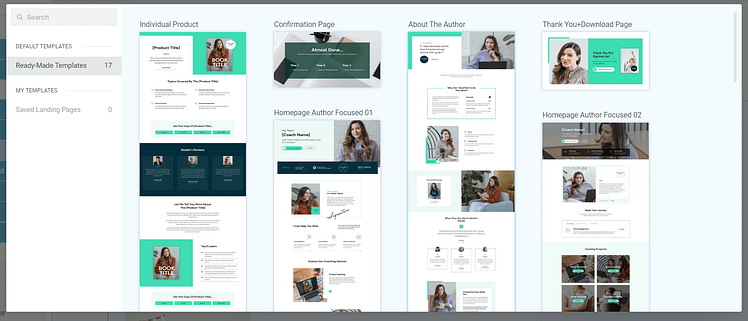
Homepage templates from Allure, our beauty and cosmetics WordPress theme
A template for your blog posts.
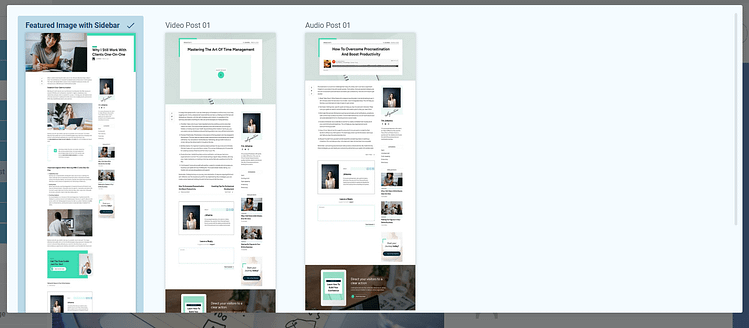
Blog Post Templates in Thrive Theme Builder
By the end of the Setup Wizard, you will have created a clean website layout that you can customize using Thrive Architect.
All of our theme templates also come with other default page templates – 404 page, about page, contact page, etc. You can find them in the “Templates” section in Thrive Theme Builder.
See how easy it is to create your site structure? No complex code, no struggling to figure out which step is which…
Just a straightforward, user-friendly process to help you get started fast.
4. Create and Customize Your Core Pages with Thrive Architect
Next, you need to create the rest of your site’s pages with Thrive Architect, our landing page builder plugin.
This tool gives you total control over your website’s look and the design flexibility to turn any template into a unique page. You also get a drag-and-drop editor to customize your pages with ease.
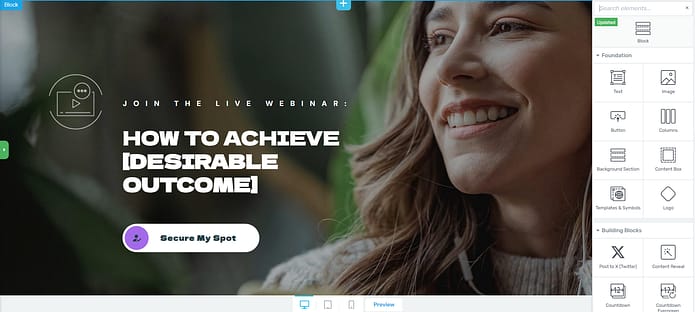
Our page templates are there to help you build pages quickly. They all look great and can easily be customized with a few clicks, drags and drops.
But the real design magic is in our block templates. You can add new blocks to your pages if you feel like something’s missing, or delete the ones you don’t want – in one click.
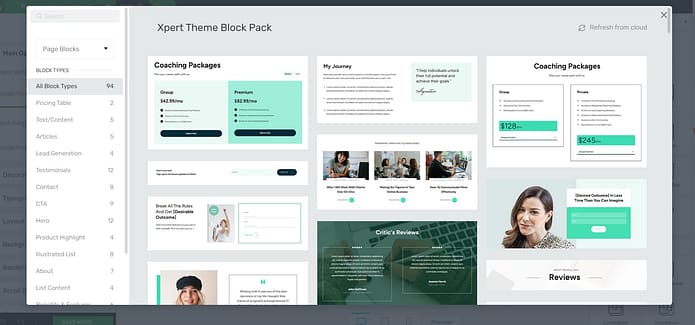
More Block Templates in Thrive Architect
These blocks cover a variety of use cases – lead-generation blocks, call-to-action (CTA) sections, countdown timers, and testimonial
templates, and so much more.
Your site’s design is in your hands – without any stress.
And in case you need more design options...
Just take a look at the right sidebar in the Thrive Architect editor:
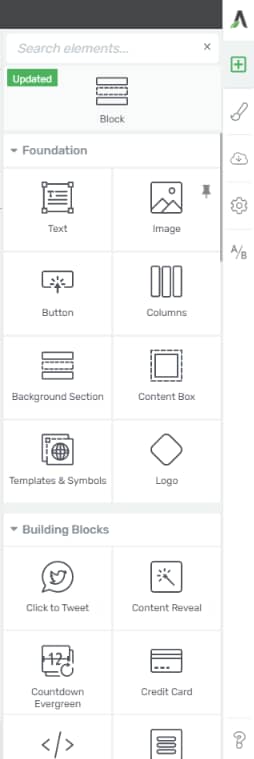
These elements give you further granular control over your site’s appearance. You also get more ways to customize different aspects of your pages to make them more interactive or conversion focused.
5. Finalize Your Homepage
Once you’ve created your custom pages, we recommend finalizing your homepage next.
When you were working through the Thrive Theme Builder Setup Wizard, you got started creating your Homepage template…
A homepage is automatically generated for you, so you don’t need to create a new page or configure any other homepage settings.
You’ll find it in the "Pages" section in the WordPress Admin Dashboard.
Search for the page titled "Generated Homepage".
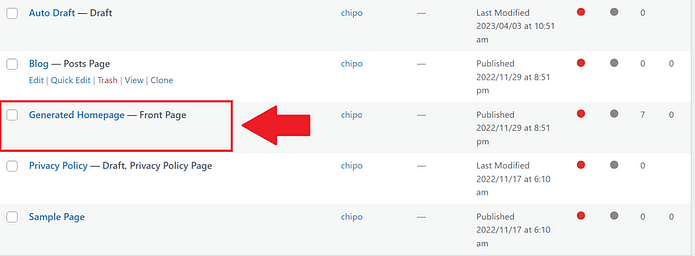
Click on the link, and you’ll be taken to the WordPress Block Editor (Gutenberg) space from the WordPress Dashboard.

In the Editor, click “Launch Thrive Architect”.
As you work on your page design, you may need to add new sections (e.g., a drop-down menu, widgets area, social proof block, or FAQ section) or remove a few. You can go right ahead and use the block templates and design elements to customize your homepage’s look.
Pro tip
Want to learn how to create an engaging, high-quality homepage that will grab your audience’s attention, build trust, and push them to convert? Check out this handy guide.
6. Connect Your Site to Your Email Marketing Service
Connect your email service through the Thrive API. You will only need to do this once for the first opt-in form you set up.
You can find tutorials for all major email providers here.
Go to your homepage or landing page and click on the opt-in form (if you have one on your page). In the sidebar, click on "Connect form with service" and follow the setup wizard.
You'll be able to configure the fields you want to show (yes or no first name field), and you will also select the action after opt-in.
Pro tip
Setting up your email marketing tool is one step. But, do you have a clear idea on how to grow your email list and generate leads? This detailed guide can help.
Bonus: Simple SEO Tips for Your Personal Branding Website
You don’t need to become an SEO wizard to get noticed — but a few smart moves can seriously boost your site’s visibility and help the right people find you.
Here are three low-effort, high-impact tips to get started:
🔍 Use your name as a keyword
This sounds obvious, but most people miss it. Include your name in your site’s title tag, homepage headline, and About page bio. Make sure Google connects you to your site — not that random forum post from 2014.
🔗 Link your socials
Cross-link your personal website and your active social profiles (LinkedIn, Instagram, X, etc.). It builds credibility and helps search engines understand your brand as a whole.
🧱 Build backlinks (without breaking your soul)
Start small — share your content in online communities, contribute to guest blogs, or get featured in an interview. One good backlink can do more for your SEO than a month of keyword tweaking.
Pro tip:
If you're using Thrive Architect, you can make all of this easier. It lets you add internal links, and fast-loading layouts without needing to touch code.
SEO doesn’t have to be overwhelming. Start with the basics, build from there, and let your website do the quiet heavy lifting.
FAQs About Building a Personal Branding Website
❓ Do I really need a personal website if I already have LinkedIn or Instagram?
Yes — and here’s why. Social media platforms are great for staying visible, but they’re not built to tell your full story. A personal brand website is your professional home base — it lets you own your content, guide first impressions, and build your online presence in a way that actually reflects you (not just your latest post or hashtag).
❓ What should I include on my personal branding homepage?
At minimum, your personal brand homepage should tell people who you are, what you do, and how to work with or contact you. That includes:
A headline that sums up your role or mission
A short, authentic About section
A portfolio website or examples of your work
Testimonials or quotes from people who trust you
Easy-to-find contact options
A call to action — even something simple like “Let’s connect”
It’s all about clarity, trust, and showing your value without making people dig for it.
❓ How can I make my website stand out online?
The key is to combine clarity with personality. Think clean layout, consistent branding, and content that actually sounds like you. Add visual elements like professional photos, brand colors, or illustrations — but don’t overdo it. Your goal is to make it feel like a conversation, not a pitch deck.
Pro tip: use clear navigation, short sections, and a CTA that tells people exactly what to do next.
❓ How do I get traffic to my personal website?
Getting eyes on your site starts with simple, intentional steps:
Share it across your social channels (yes, include it in your bio and email signature)
Optimize for online visibility — use your name and niche keywords in your titles and content
Contribute to guest blogs, podcasts, or interviews and link back
Add content like blog posts or lead magnets to give people a reason to visit — and stay
Even one solid backlink or share can spark momentum. It’s less about chasing traffic spikes, more about building steady visibility over time.
Next Steps: Create a Lead Magnet to Build Your Audience
Now that your personal branding website is live, let's talk about attracting the right people. Creating a lead magnet doesn't have to be overwhelming - think of it as your digital handshake.
Here's what to do:
Remember, you're not trying to change the world here - just helping one person solve one specific problem. Start small, learn what works, and adjust as you go. Your future audience will thank you for it!
And for more technical details on creating a lead magnet (and funnel) to grow your audience, check out this tutorial.
Ready to Start Building Your Personal Website?
Now you’ve seen how easy it is to go from zero to a clean, engaging personal website using Thrive Architect and Thrive Theme Builder.
As a bonus here are 4 free resources/tutorials to help you drive the right traffic to your website and grow your brand:
As you get more comfortable with our user-friendly tools, you'll start refining every detail to turn your simple design into an impressive website that offers your visitors an amazing user experience — and also gets them to work with, buy from, or hire you.
But most of all, make sure to have fun and we can’t wait to see what you build!





Personal branding lets you control the narrative of your professional image.
With your templates it’s so easy to build a website….been using thrive themes for years and keep on doing this for the next years…
Thanks for this helpful blog post personal branding is so important to reach more potential clients and stand out from the competition.
About how long does it take to build a Perfect Personal Branding Website?
Lately I have created my website using Thrive themes and after years of not being so sastisfied of the work I had done by myself, now I can really say I have a beautiful and functional website! Thanks Thrive!
This is a very helpful article. I have used Thrive Themes in the past and it was very helpful in developing this kind of site.
Wow, I didn’t realise thrive offered so much customisable templates!
Thanks for the useful tips
Very helpful post!
Building a brand is important in standing out in the market! Thanks for the detailed yet simple guide in learning out to do it!
I understand how this could help me move forward in my career.
I truly love how innovative and user-friendly this website builder seems.
Thrive looks like an easy way to build a customized site.
Having a personal blog opens a plethora of options for online earning.
I have been learning and implementing these techniques to earn through online media with the help of having a blog.
Thanks for making this guide to make beautiful website with just drag and drop.
This is a great way to market yourself and promote your projects. A personal brand is key as people trust people.
Awesome oportunity to grow !
Very informative. Please keep the information coming!